
Contents
- Install Package
- Adding Webpack Config
- Writing the Image Loader Component
- Logic behind rendering images
- Adding CSS to Image loader
- Import anywhere and use it
- Github Repo of this Code
Install package
Run in the terminal :
npm install --save-dev image-trace-loader
Adding Webpack config
Nothing serious to do! Chill 🥶
We just need to add image-trace-loader to our Webpack config which will help in loading the different image extensions.
If you are using create-react-app :
Then we need to use an additional command called the eject command to get our webpack config.
Run in terminal to eject :
npm run eject
You can now see a folder structure which looks like this:
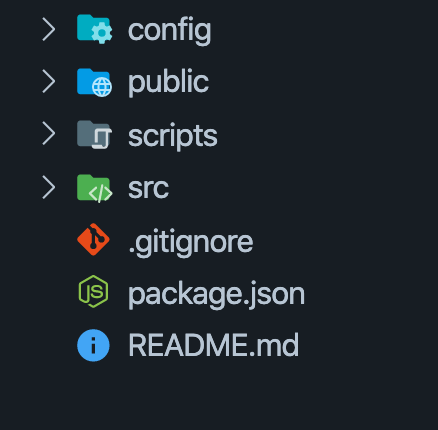
Go to config folder and open webpack.config.js
Now we need to find the rules for image extensions that are already defined in this configuration file.
For that, we can use Ctrl + F to open finder in the editor and search for png.
There's only one reference to png in the entire file so it becomes easy for us.
Now you will see some rules already defined for image extensions which looks like this:
// predefined rules for images
{
  test: [/\.bmp$/, /\.gif$/, /\.jpe?g$/, /\.png$/],
  loader: require.resolve('url-loader'),
  options: {
    limit: imageInlineSizeLimit,
    name: 'static/media/[name].[hash:8].[ext]',
  },
}
Remove the old object and add this object there:
{
  test: [/\.bmp$/, /\.gif$/, /\.jpe?g$/, /\.png$/],
  use: [
    // adding image-trace-loader
    {
      loader: "image-trace-loader",
    },
    {
      loader: "url-loader",
      options: {
        limit: imageInlineSizeLimit,
        name: "static/media/[name].[hash:8].[ext]",
      },
    },
  ],
}
Note that we added the :
{
  loader: "image-trace-loader",
},
An important thing to note here is that we are adding the image-trace-loader to work together with url-loader.
That's all! 🤓
If you are using custom webpack configuration :
Add this to config for webpack to recognize image extensions:
module.exports = {
  module: {
    rules: [
      {
        test: /\.(gif|png|jpe?g)$/i,
        use: [
          {
            loader: "image-trace-loader",
          },
        ],
      },
    ],
  },
};
Wonderful! 🥳
Writing the Image Loader Component
- Create a component called
ImageLoader.
import React, { useState } from "react";

const ImageLoader = () => {};

export default ImageLoader;
- Make a state for the images so that we can trigger loading state or loaded state and show appropriate images - initially set to
false.
import React, { useState } from "react";

const ImageLoader = () => {
  // state of images
  const [imageLoaded, setImageLoaded] = useState(false);
};

export default ImageLoader;
- Define props for the component called
sourceandalt.
import React, { useState } from "react";

// Props: source, alt
const ImageLoader = ({ source, alt }) => {
  // state of images
  const [imageLoaded, setImageLoaded] = useState(false);
};

export default ImageLoader;
-
We need to import the image using the
requirefunction and pass it the value of propsource. -
This gives us two URLs of images:
src- the real image urltrace- the SVG trace image url ( used to show when the image is loading )
import React, { useState } from "react";

// Props: source, alt
const ImageLoader = ({ source, alt }) => {
  // state of images
  const [imageLoaded, setImageLoaded] = useState(false);

  // src image and trace image url
  const { src, trace } = require(`./${source}`);
};

export default ImageLoader;
Logic behind rendering images
- Ideally, we want both images to be stacked only then we would be able to show the loading image (SVG trace image) when the image is loading
import React, { useState } from "react";

// Props: source, alt
const ImageLoader = ({ source, alt }) => {
  // state of images
  const [imageLoaded, setImageLoaded] = useState(false);

  // src image and trace image url
  const { src, trace } = require(`./${source}`);

  // render code
  return (
    <div>
      <img
        src={src}
        alt={alt}
        loading="lazy"
        style={{
          opacity: imageLoaded ? "1" : "0",
        }}
        onLoad={() => setImageLoaded(true)}
      />

      <img
        style={{
          opacity: imageLoaded ? "0" : "1",
        }}
        src={trace}
        alt={alt}
      />
    </div>
  );
};

export default ImageLoader;
In the above code, we see the onLoad event in the first img tag. This will be called when the original image is fully loaded and rendered. Here we need to set the state of imageLoaded state to true.
Both the image tags have the style attributes. When the state is changed from false to true the original image opacity will be set to 1 from 0 and the opacity of trace image will be set to 0 from 1.
This is because we want the trace image to disappear and show the original image when it's loaded.
Adding CSS to Image loader
This the CSS we need to use to make it work.
.imageLoader {
  height: 50vh;
  margin: 0 auto;
  position: relative;
}

.imageLoader img {
  height: 100%;
}

.imageLoader .realImg {
  position: absolute;
  top: 0;
  left: 0;
  transition-property: background-color, border-color, color, fill, stroke,
    opacity, box-shadow, transform;
  transition-property: all;
  transition-duration: 300ms;
  transition-timing-function: cubic-bezier(0, 0, 0.2, 1);
}
let's import this CSS file into our ImageLoader component.
import React, { useState } from "react";
import "./ImageLoader.css";

const ImageLoader = ({ source, alt }) => {
  .
  .
  .
}
Here we need to understand 2 things,
.imageLoaderclass.realImgclass
.imageLoader class :
if you look closely you can see that we have defined
position: relative;
in our class.
This class is added to the wrapper of the 2 image tags. So that wrapper is now considered as the starting point of 2 img tags.
let's add this class to our wrapper now.
// render code
return (
  // add .imageLoader class
  // to wrapper
  <div className="imageLoader">
    <img
      src={src}
      alt={alt}
      loading="lazy"
      style={{
        opacity: imageLoaded ? "1" : "0",
      }}
      onLoad={() => setImageLoaded(true)}
    />

    <img
      style={{
        opacity: imageLoaded ? "0" : "1",
      }}
      src={trace}
      alt={alt}
    />
  </div>
);
.realImg class :
here we have,
position: absolute;
top: 0;
left: 0;
defined.
We need to add this class to our original img tag. This makes sure that our original image starts rendering from the top-left region relative to the wrapper.
let's add it now.
// render code
return (
  // add .imageLoader class
  // to wrapper
  <div className="imageLoader">
    // add .realImg class here
    <img
      className="realImg"
      src={src}
      alt={alt}
      loading="lazy"
      style={{
        opacity: imageLoaded ? "1" : "0",
      }}
      onLoad={() => setImageLoaded(true)}
    />
    <img
      style={{
        opacity: imageLoaded ? "0" : "1",
      }}
      src={trace}
      alt={alt}
    />
  </div>
);
🙌🏻 Wonderfull! You just made a cool image loader.
Import anywhere and use it
import ImageLoader from "./ImageLoader";

const App = () => <ImageLoader source="img.jpg" alt="An image" />;

export default App;