To easily create newsletter subscription forms with marketing and automation features, you can use the ActiveCampaign web application. With ActiveCampaign you can easily create newsletter subscription forms with ease using drag and drop elements from the ActiveCampaign dashboard.
It also supports a variety of other features like:
- Automations with different apps for different events ⏰
- Embedding messaging system into websites 📨
- Landing page creation 🌐
- Subscriber list and contacts management with integration for different apps 📦
- and many more...🌟
Contents
- Step 1: Signup for an account with ActiveCampaign
- Step 2: Add your address details
- Step 3: Create your newsletter subscription form
- Step 4: Integrate the newsletter with your website
- Step 5: Test the newsletter
- Links to resources
🌟 Result 🌟
The steps to integrate a newsletter subscription form are listed below:
Step 1: Signup for an account with ActiveCampaign
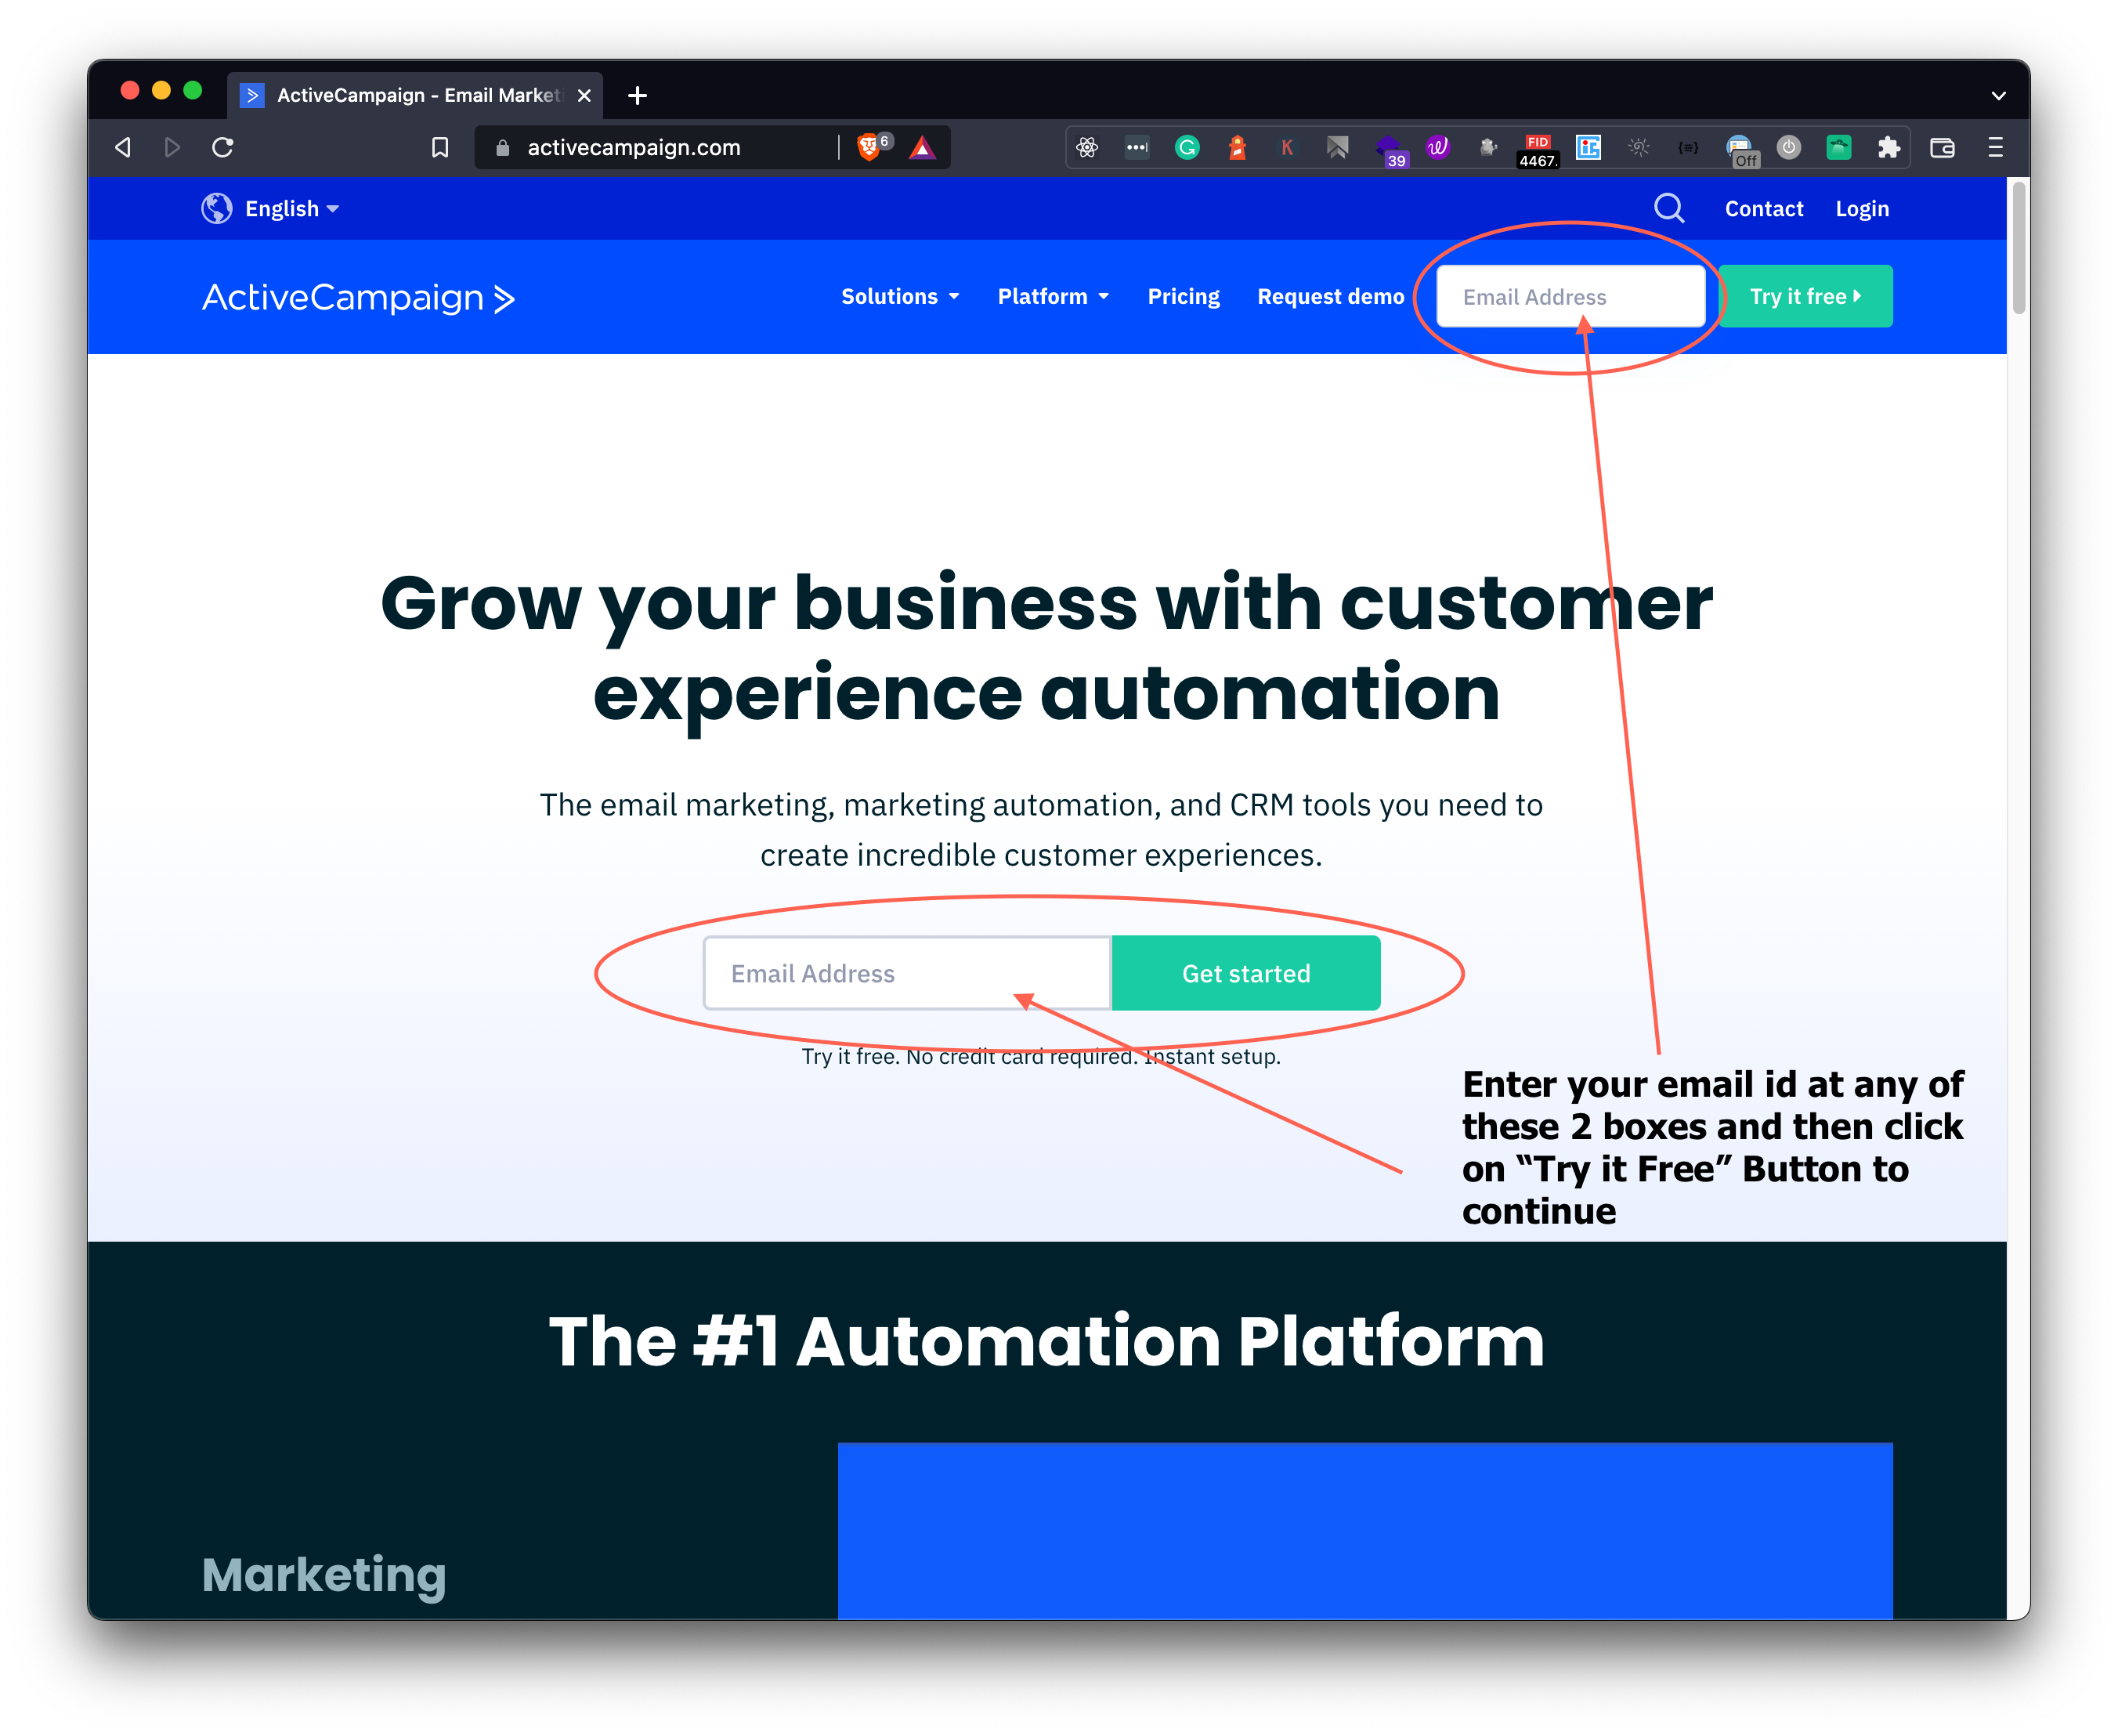
Go to the ActiveCampaign website

After that, you need to enter your email id on the textboxes in the below images and click on the Try it Free button to start the account creation process on ActiveCampaign.
Now you will see a page where you need to enter your name and a valid mobile number like in the below image,
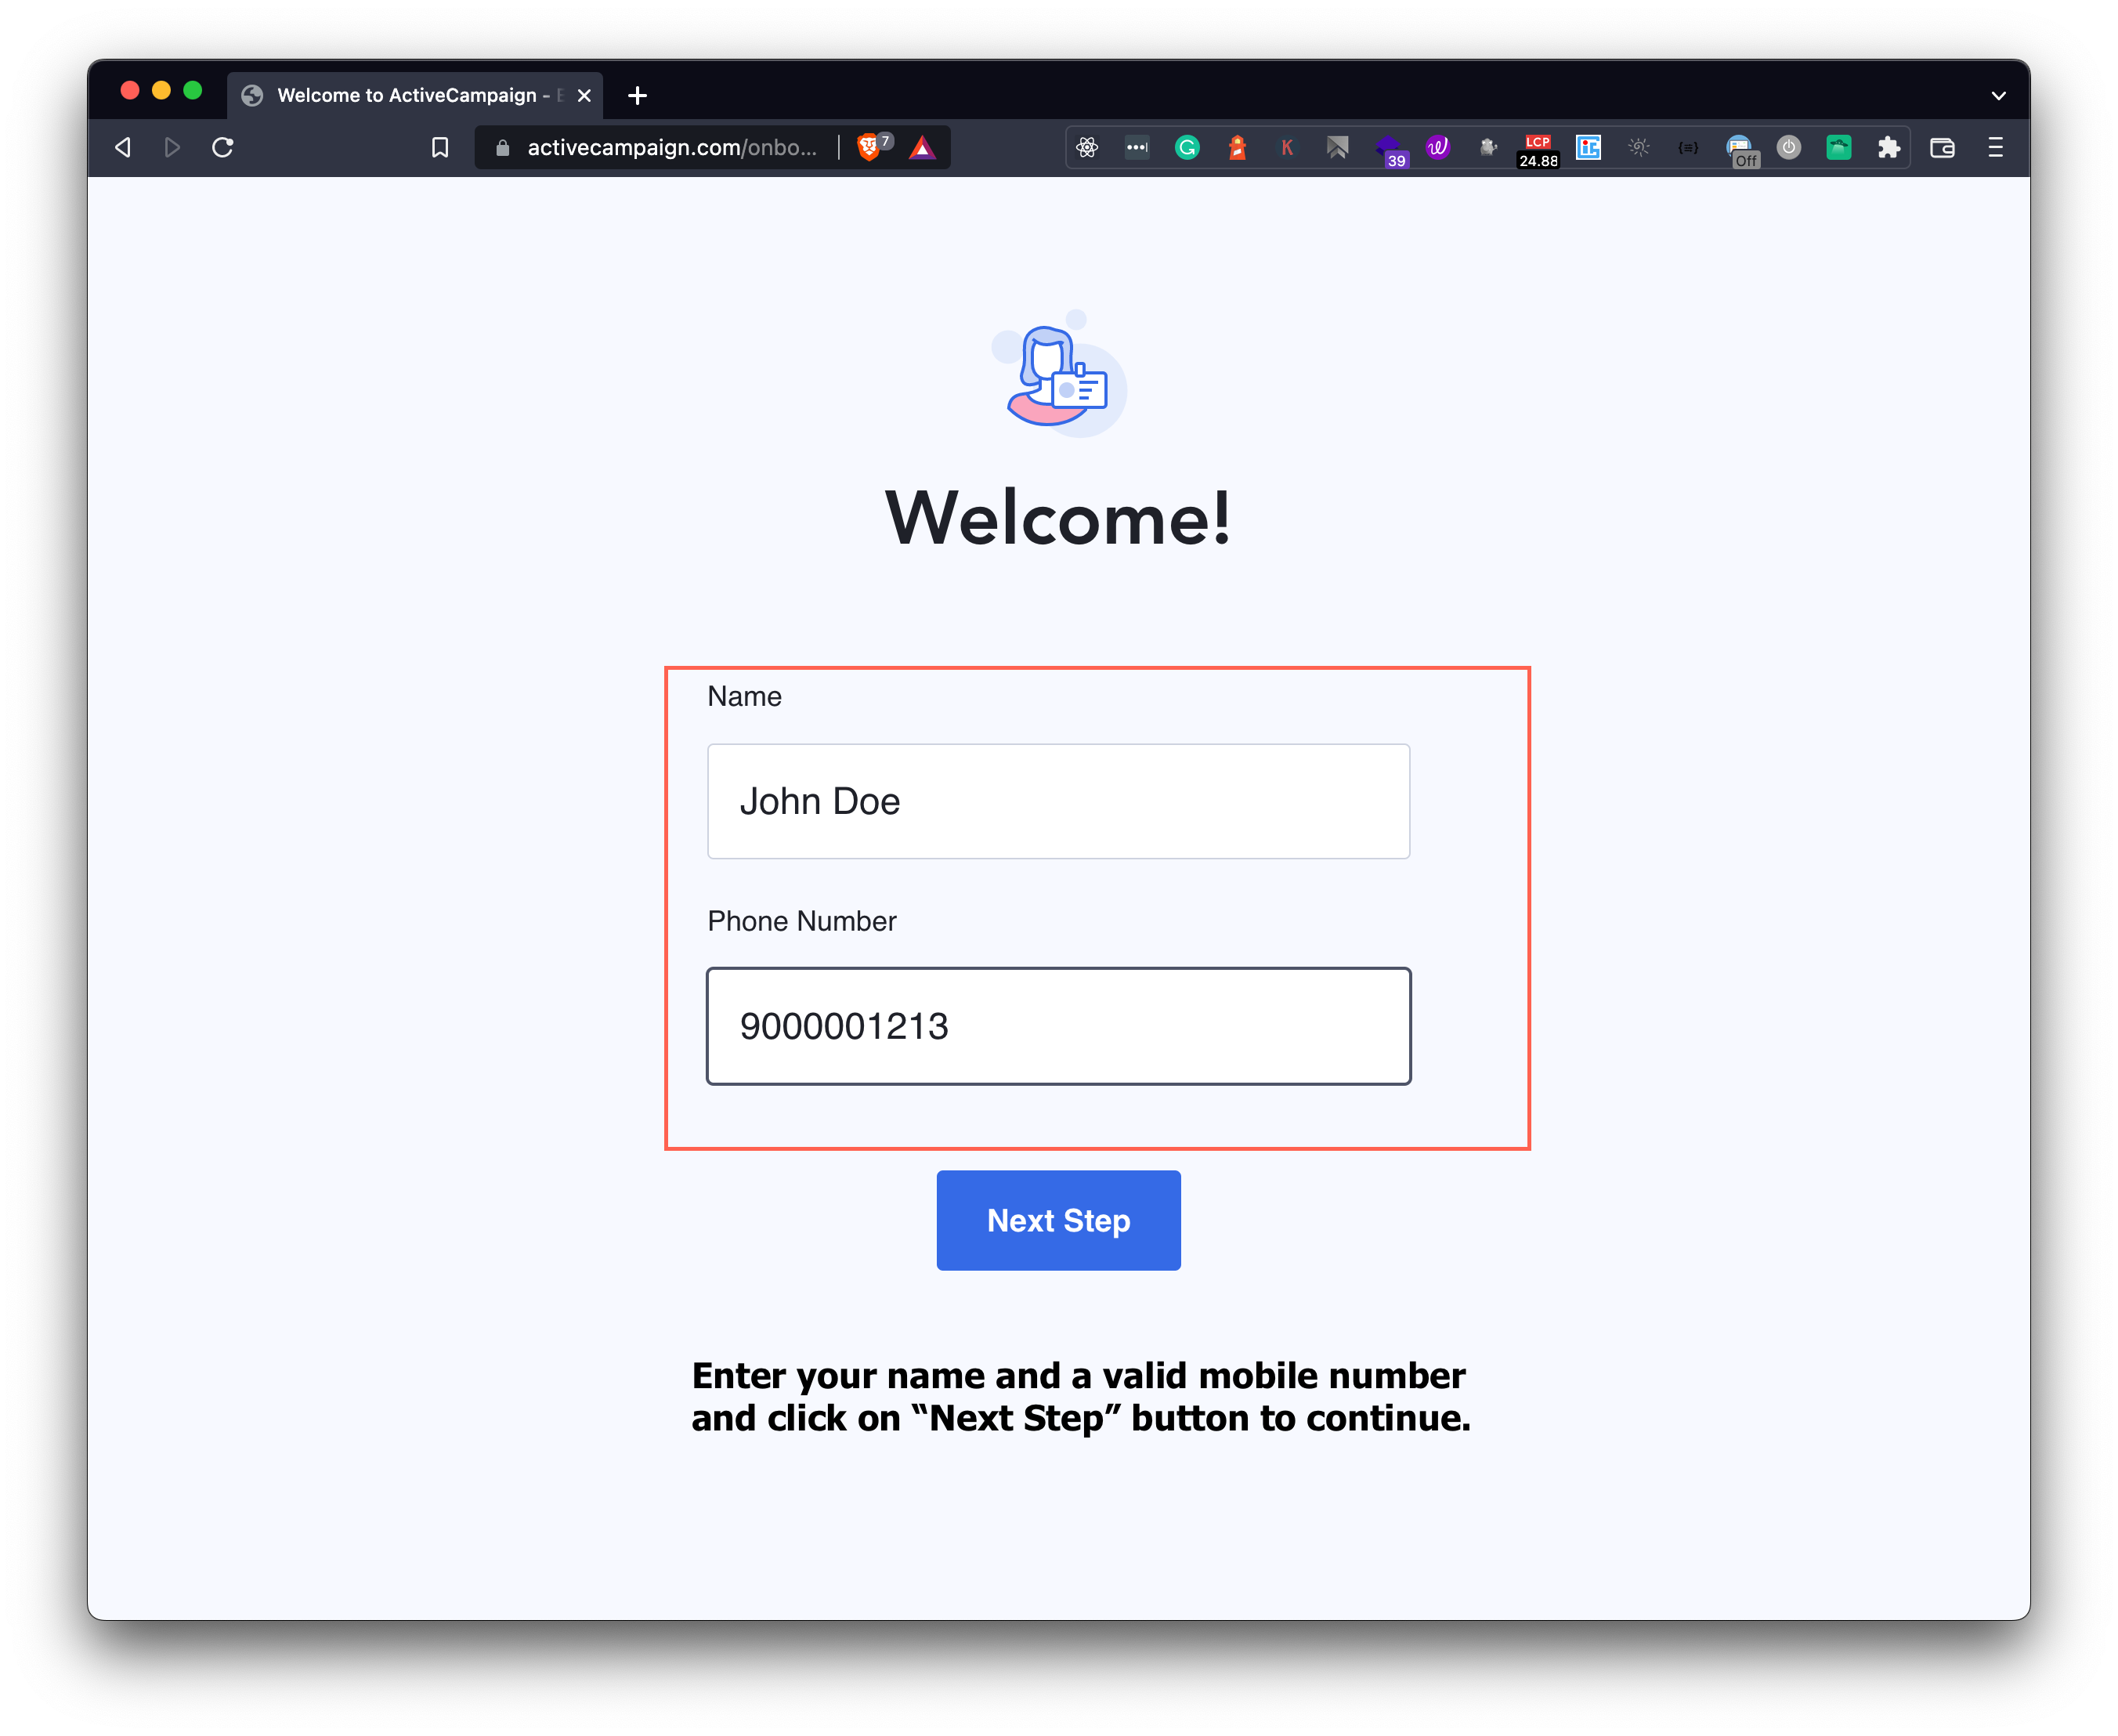
Click on the Next Step button to continue.
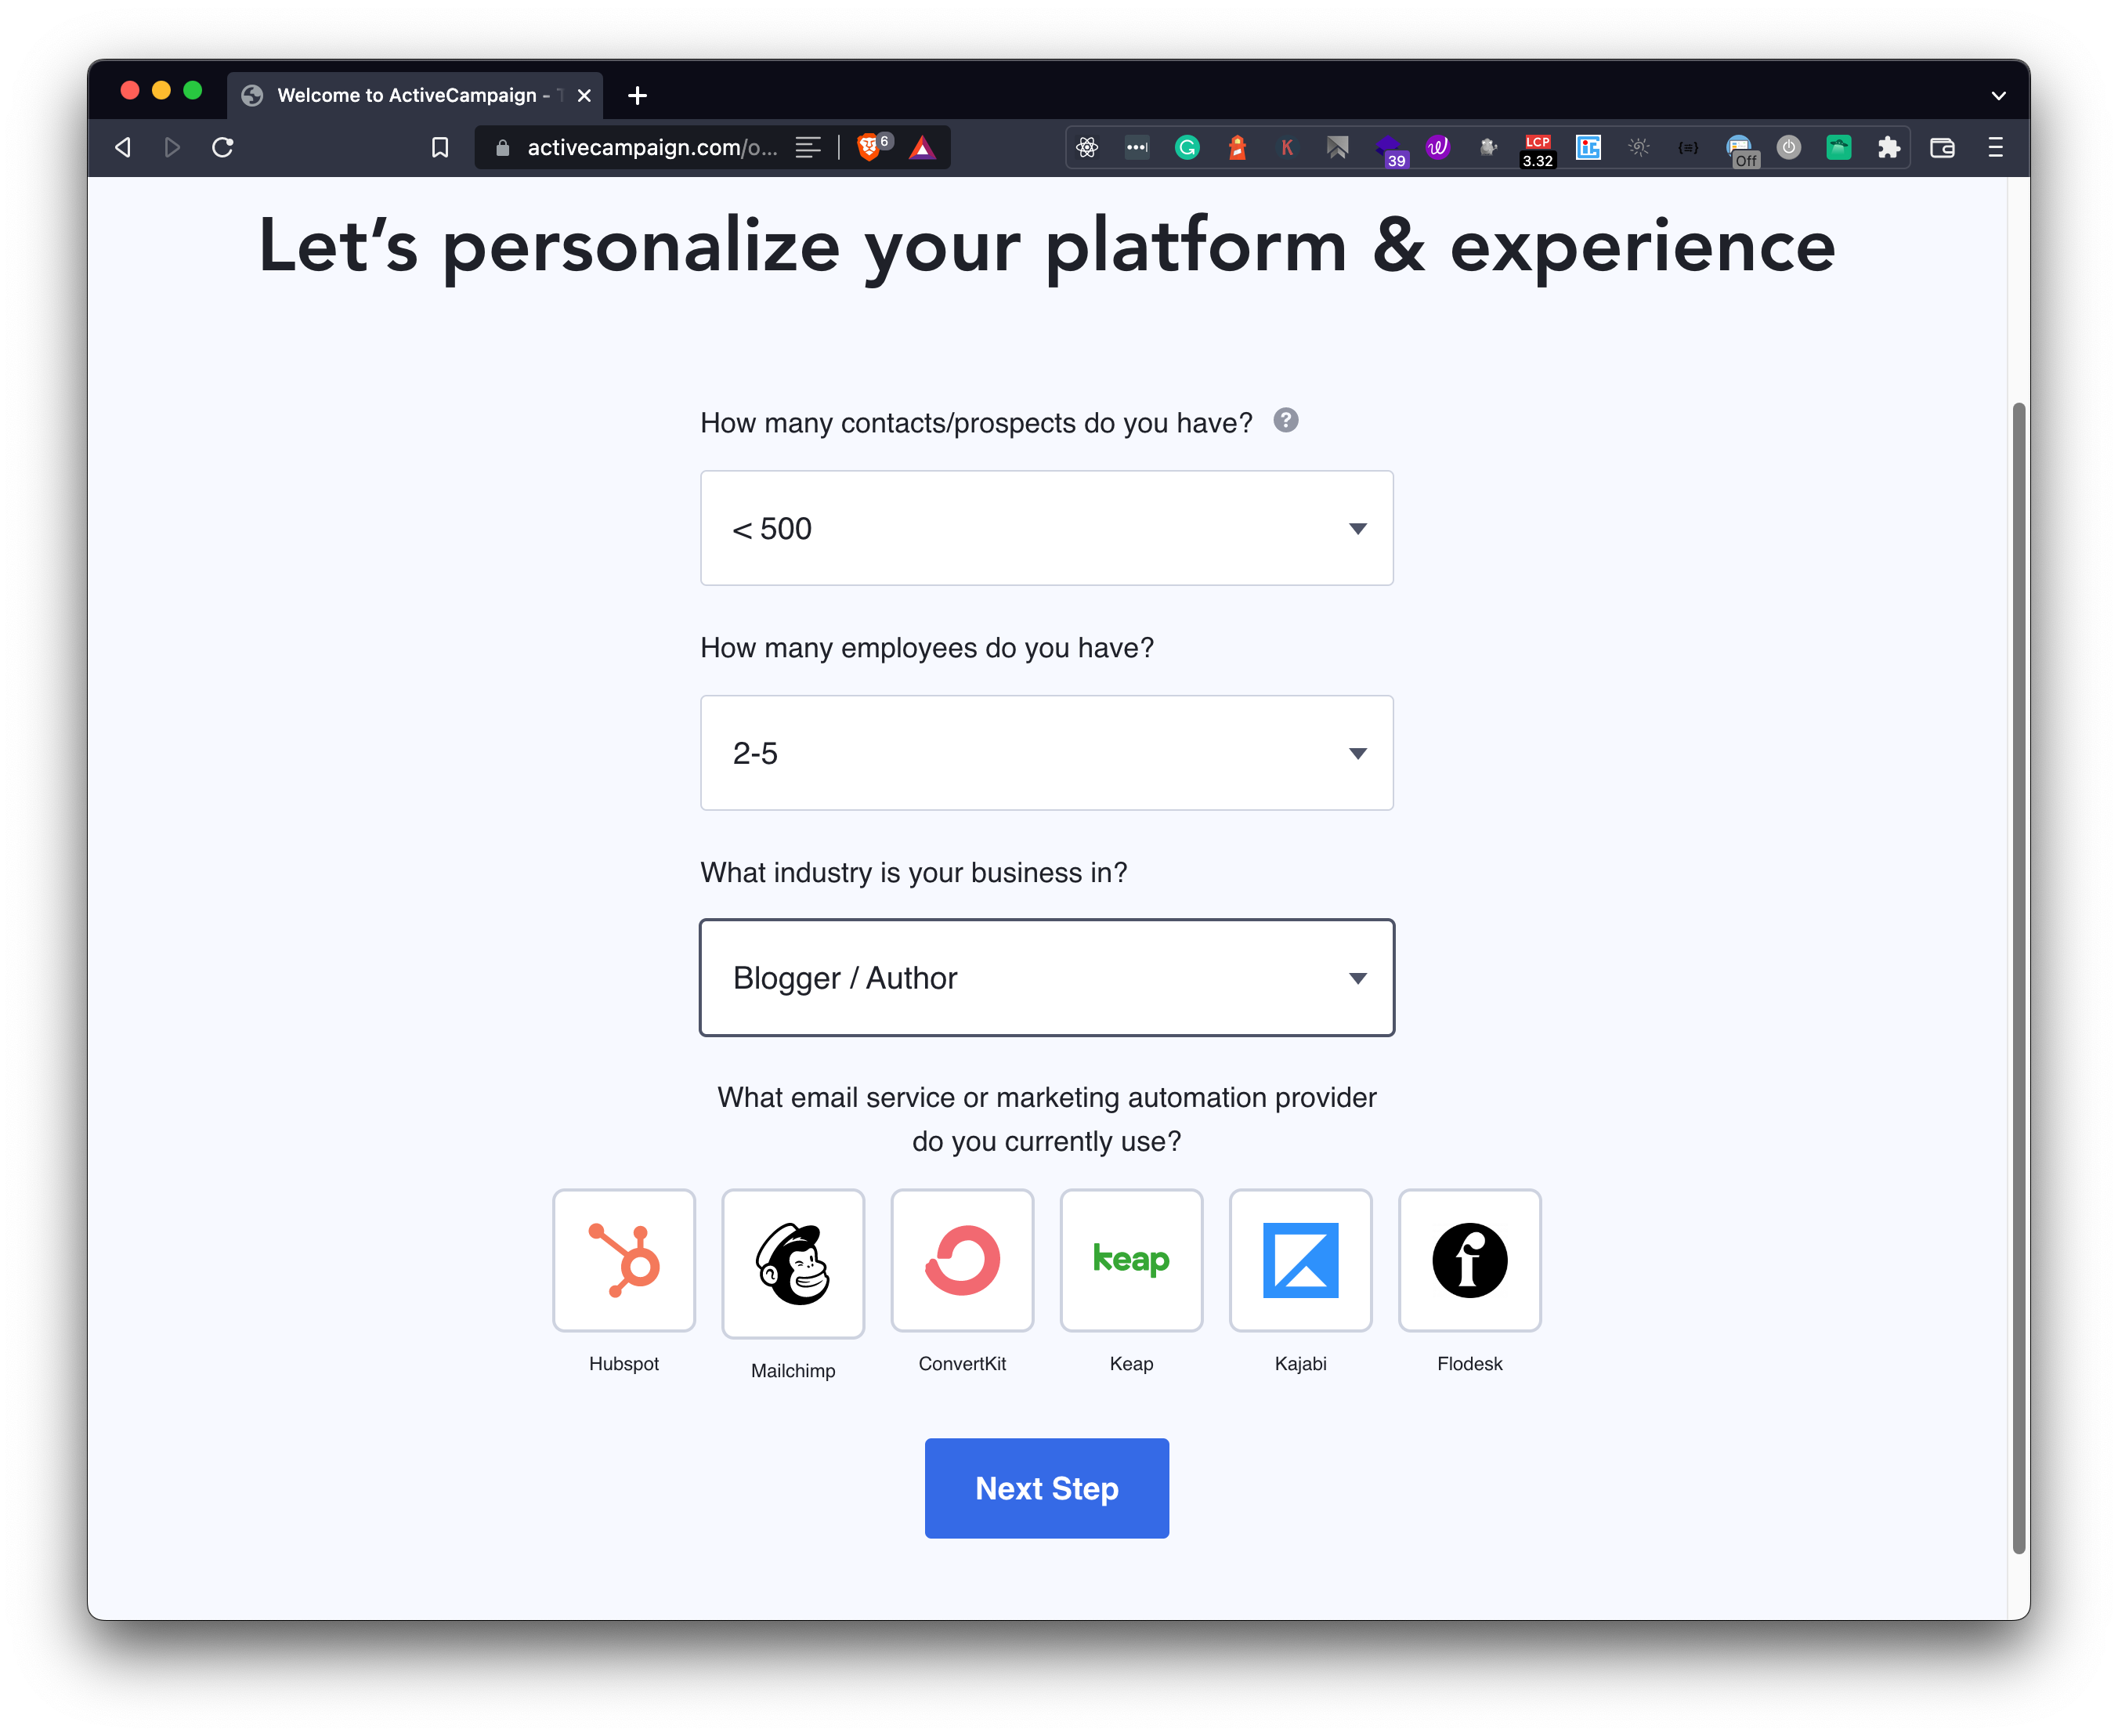
On the next page, ActiveCampaign will ask for some details about your hobbies or your company so that they can show you the best way to onboard you into the platform. You can enter the required details and then click on the Next Step button to continue.
It may look similar to the below image,
Our next step is to choose a strong password for your account and click on the Take Me To My Account to finalize the account creation process like in the below image,
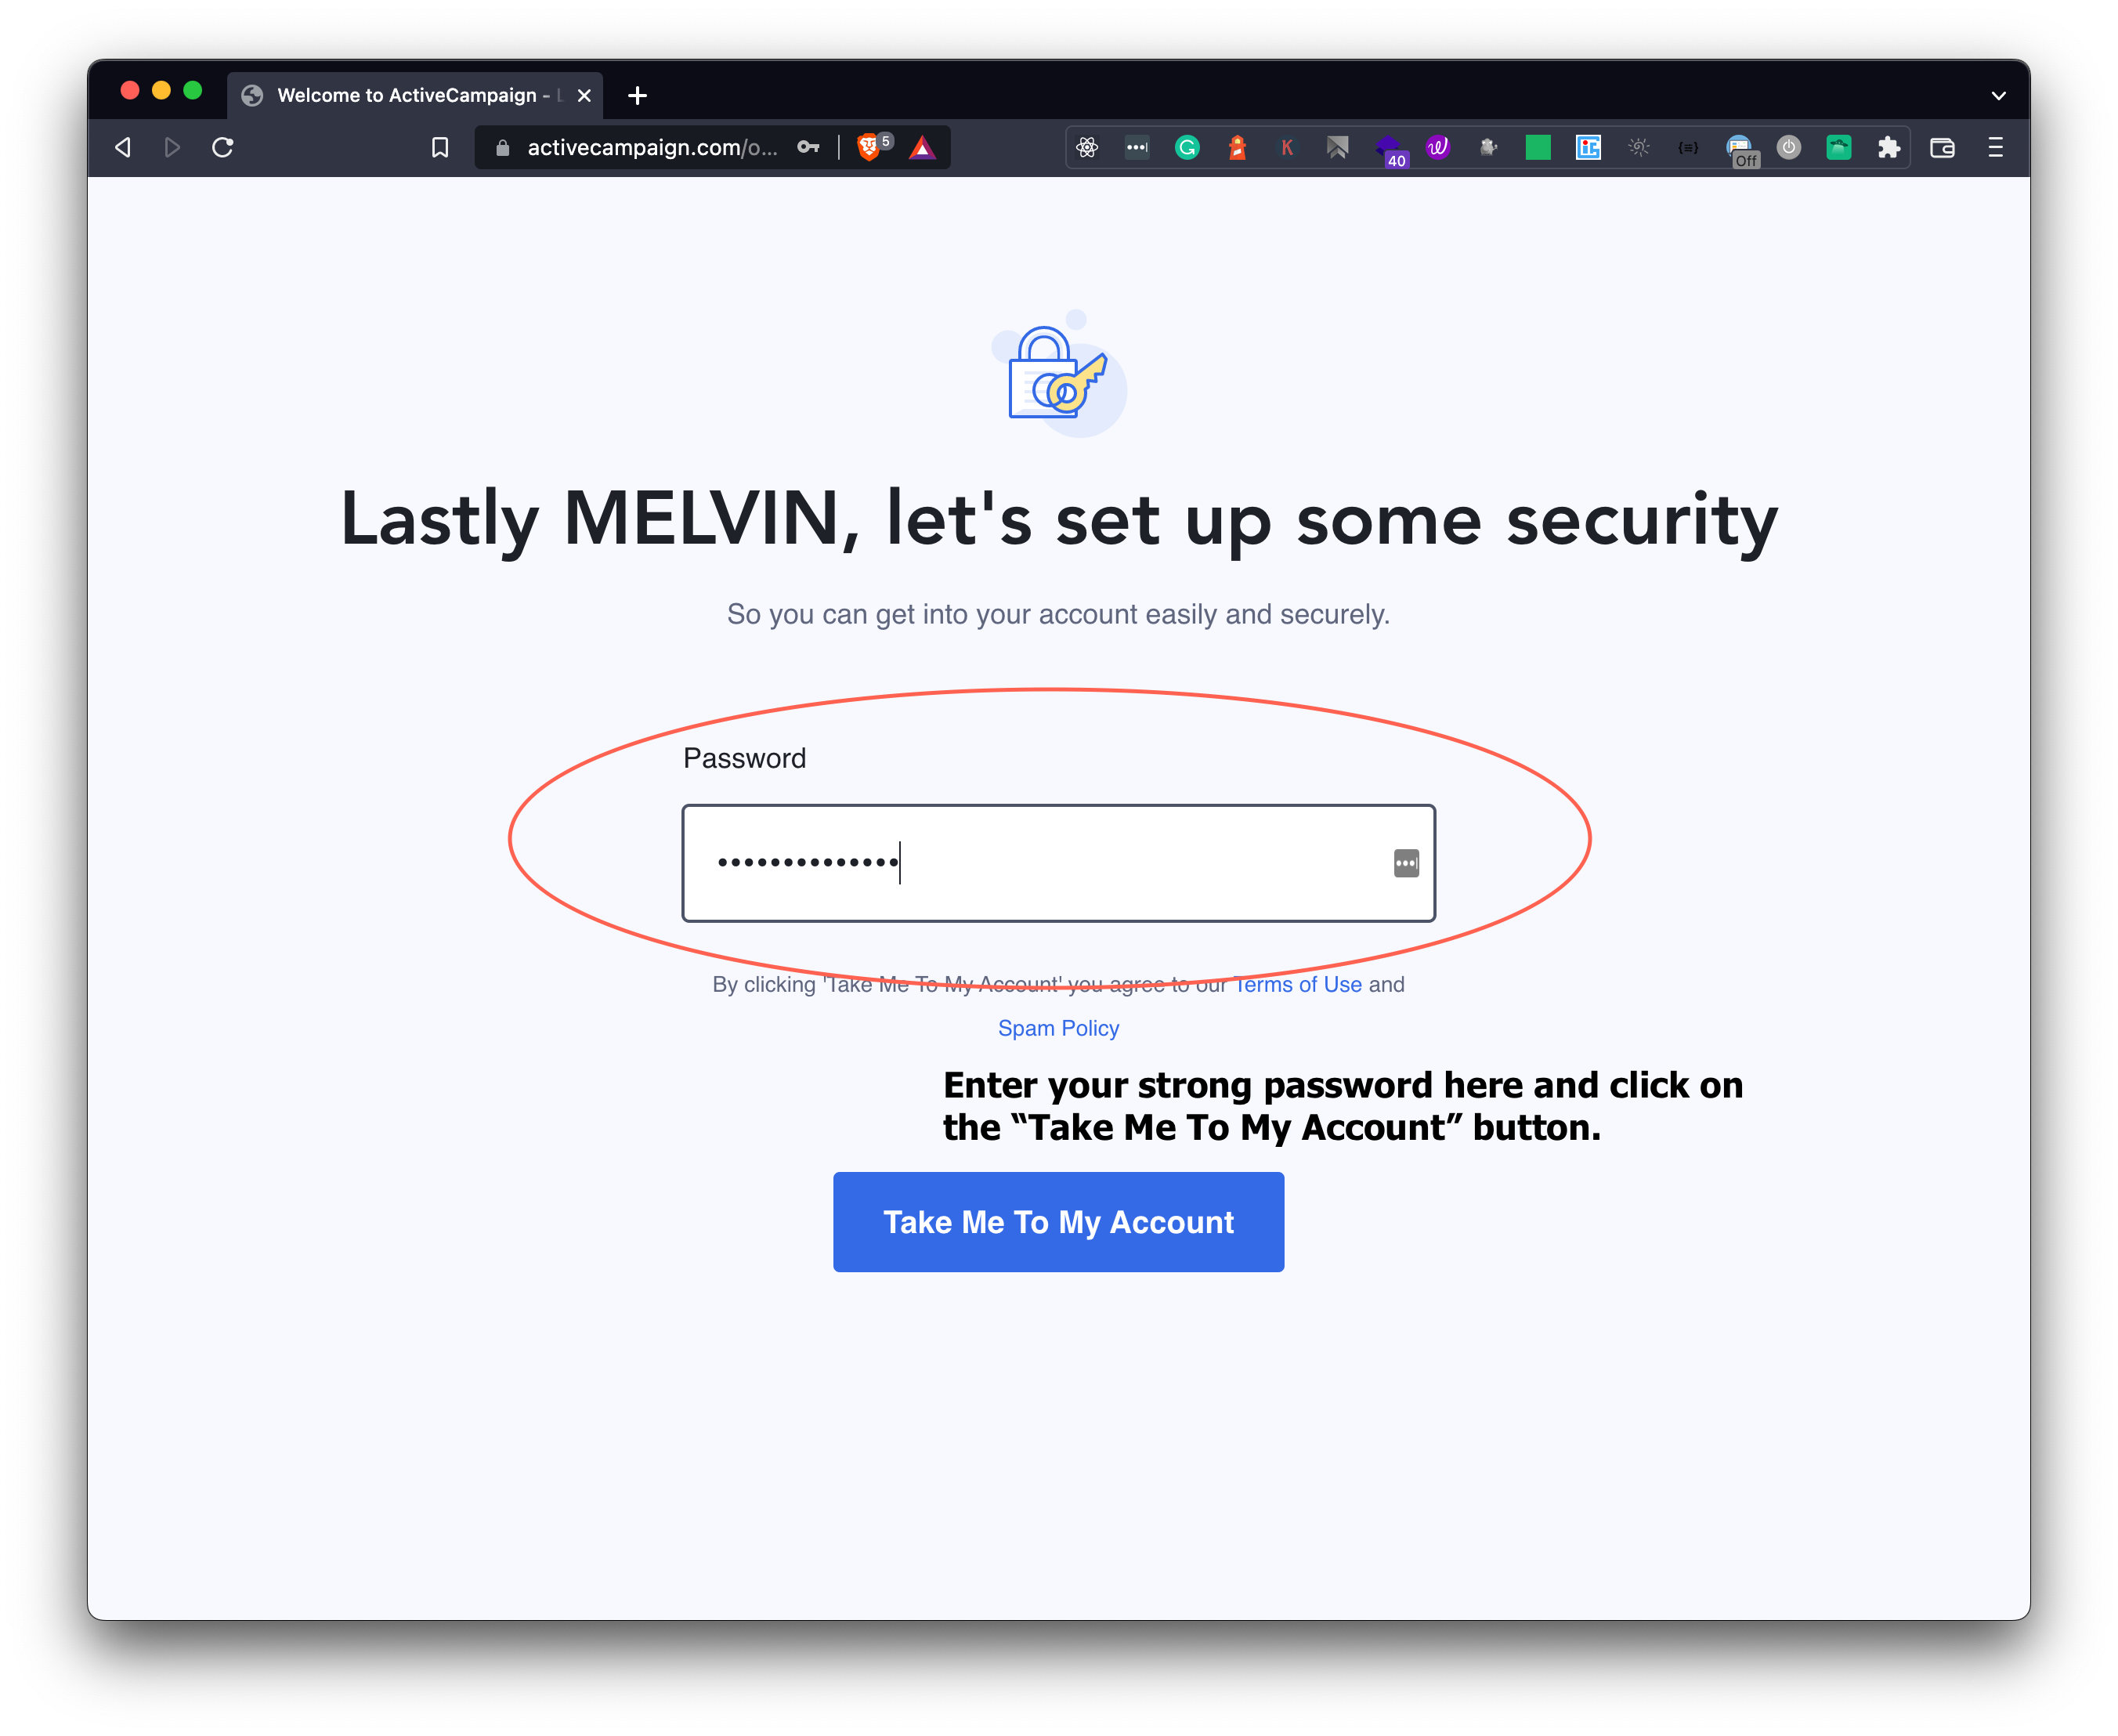
Hurray 🎉! You have completed the account creation process on ActiveCampaign and you will be greeted with a beautiful dashboard where you can see a lot of features we can implement in our apps.
Step 2: Add your address details
Your's or the company's address (incase it is a company) is an important part of the emails you will be sending to your subscribed users as some of the countries requires your address or the company address to be shown at the footer or the bottom of the emails.
You can easily add an address in ActiveCampaign by clicking on the Settings icon like in the below image,

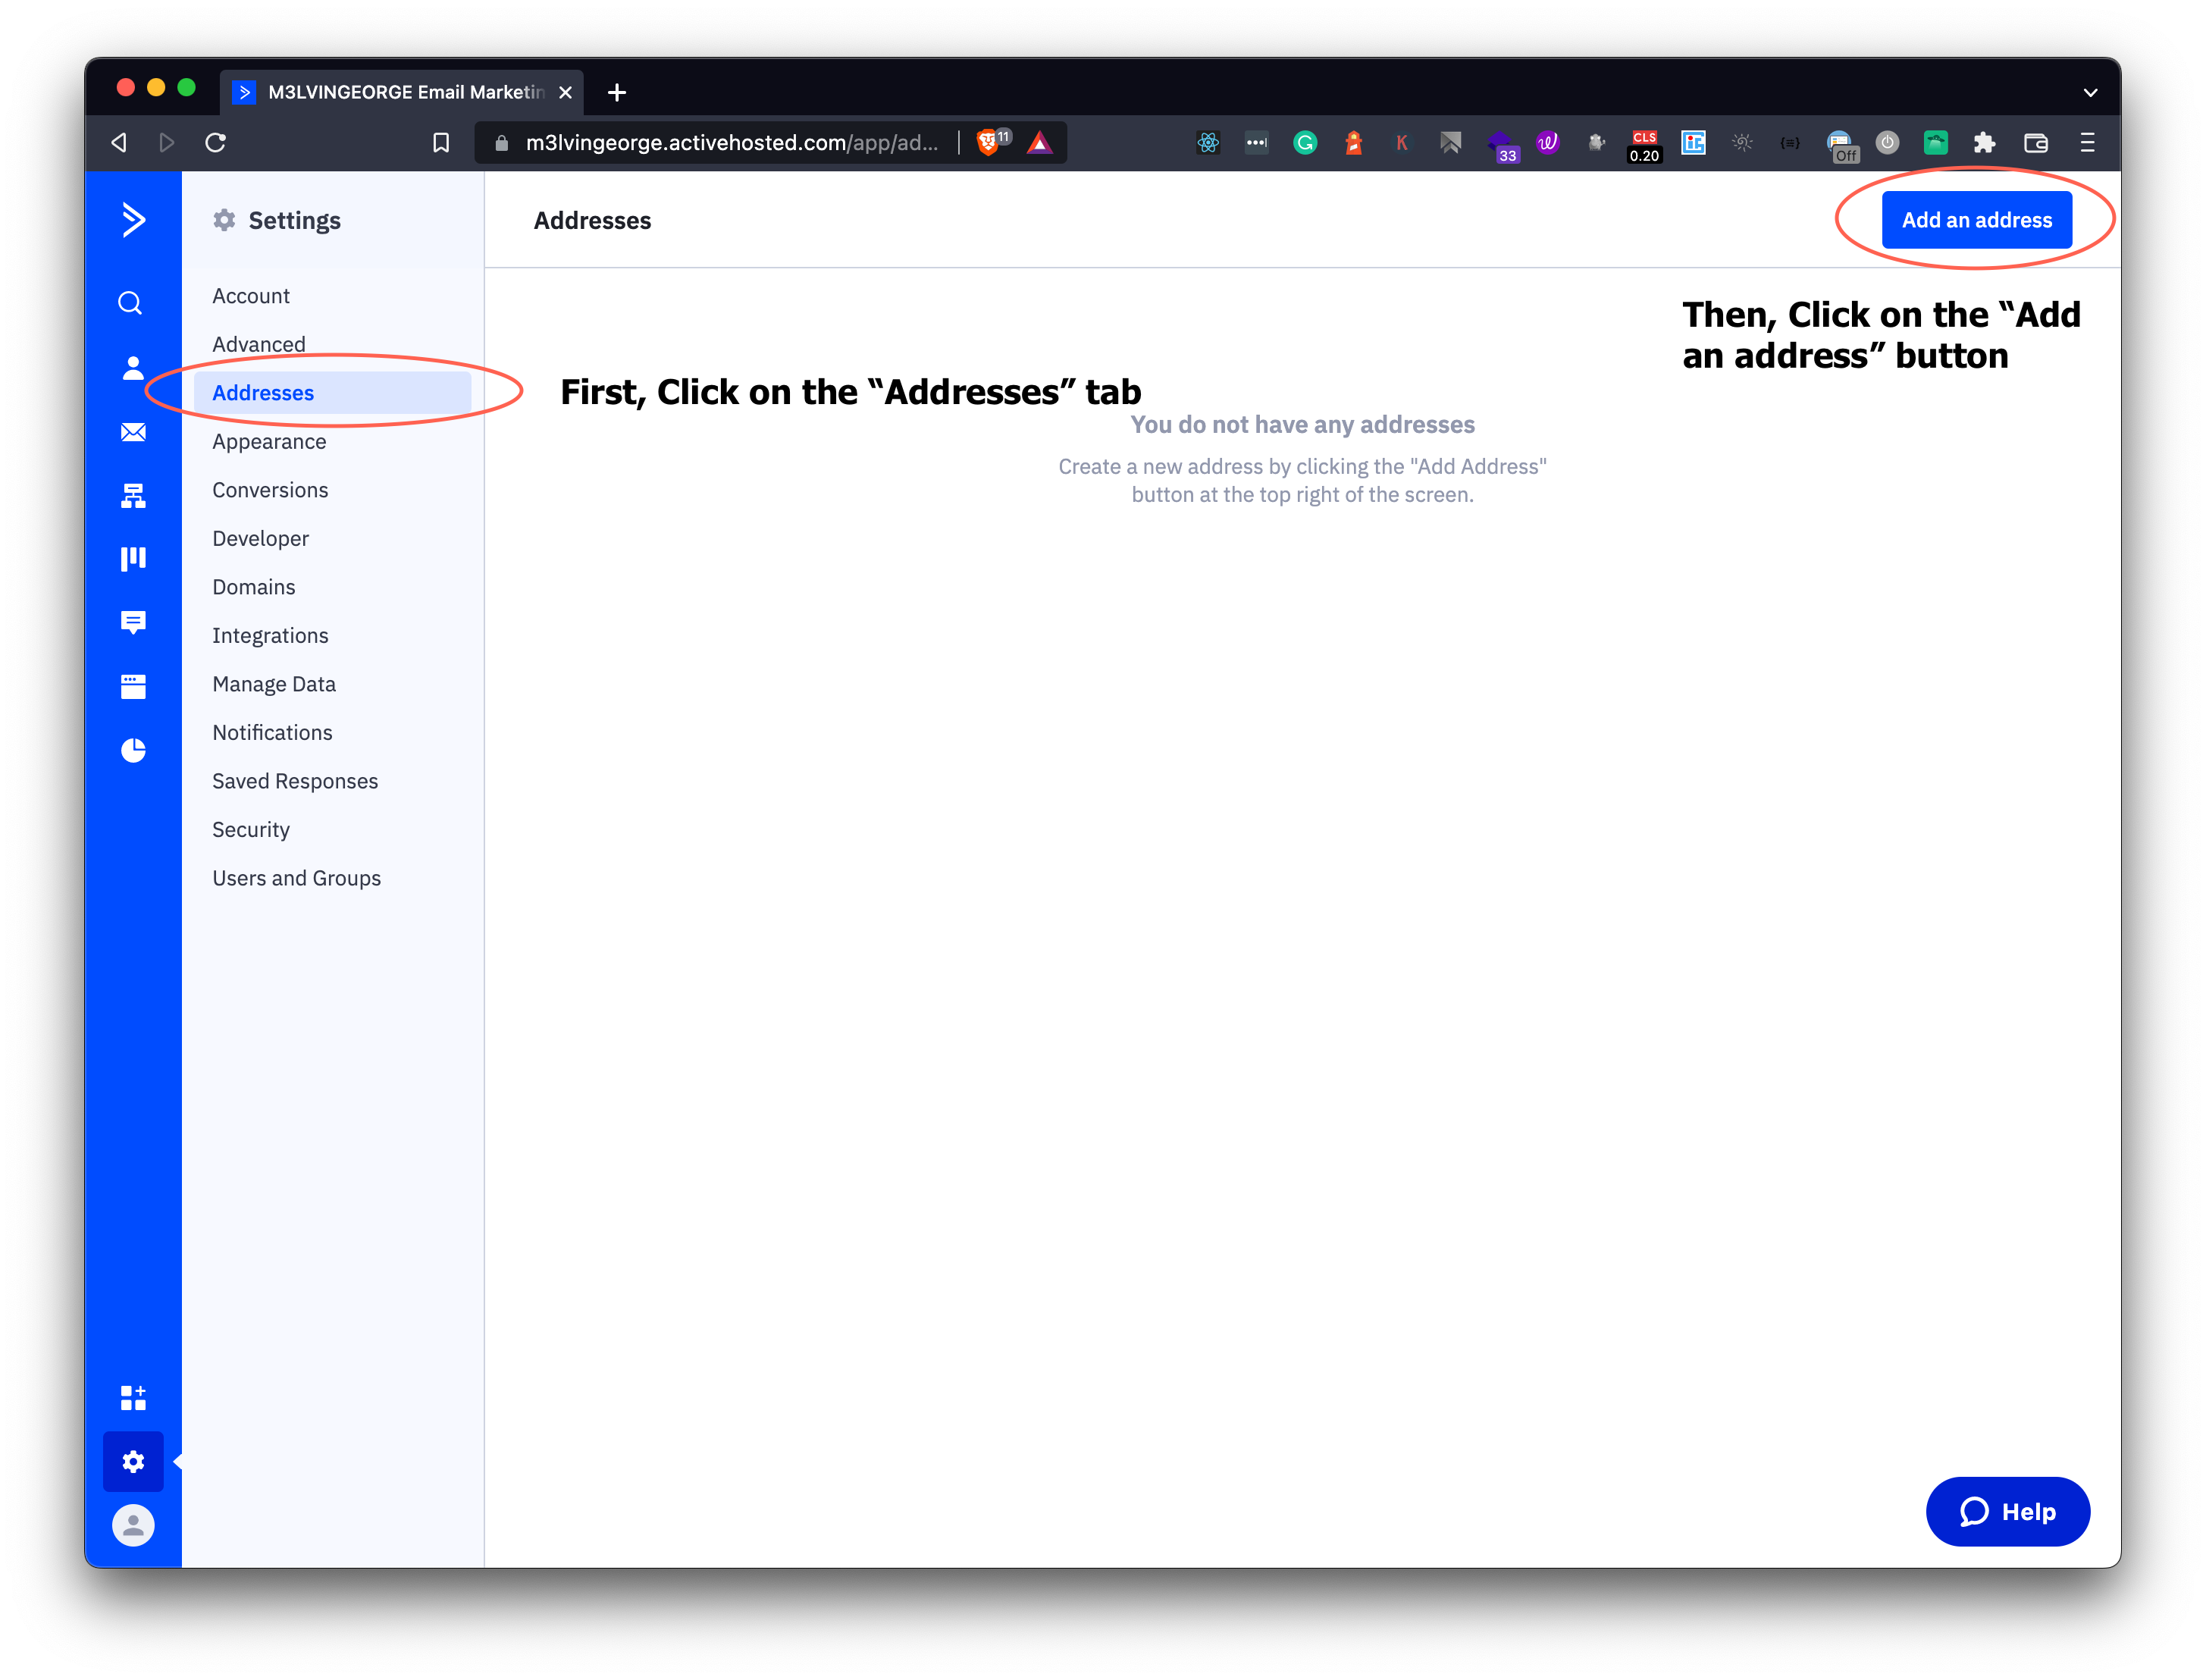
After clicking, you will be greeted with a lot of settings on the left side of the screen, you need to click on the Addresses tab and then click on the Add an address button like in the below image,
Enter your valid address details and save them by clicking on the Add Address button on the top-right corner of the screen.
An example of address details may look like this,
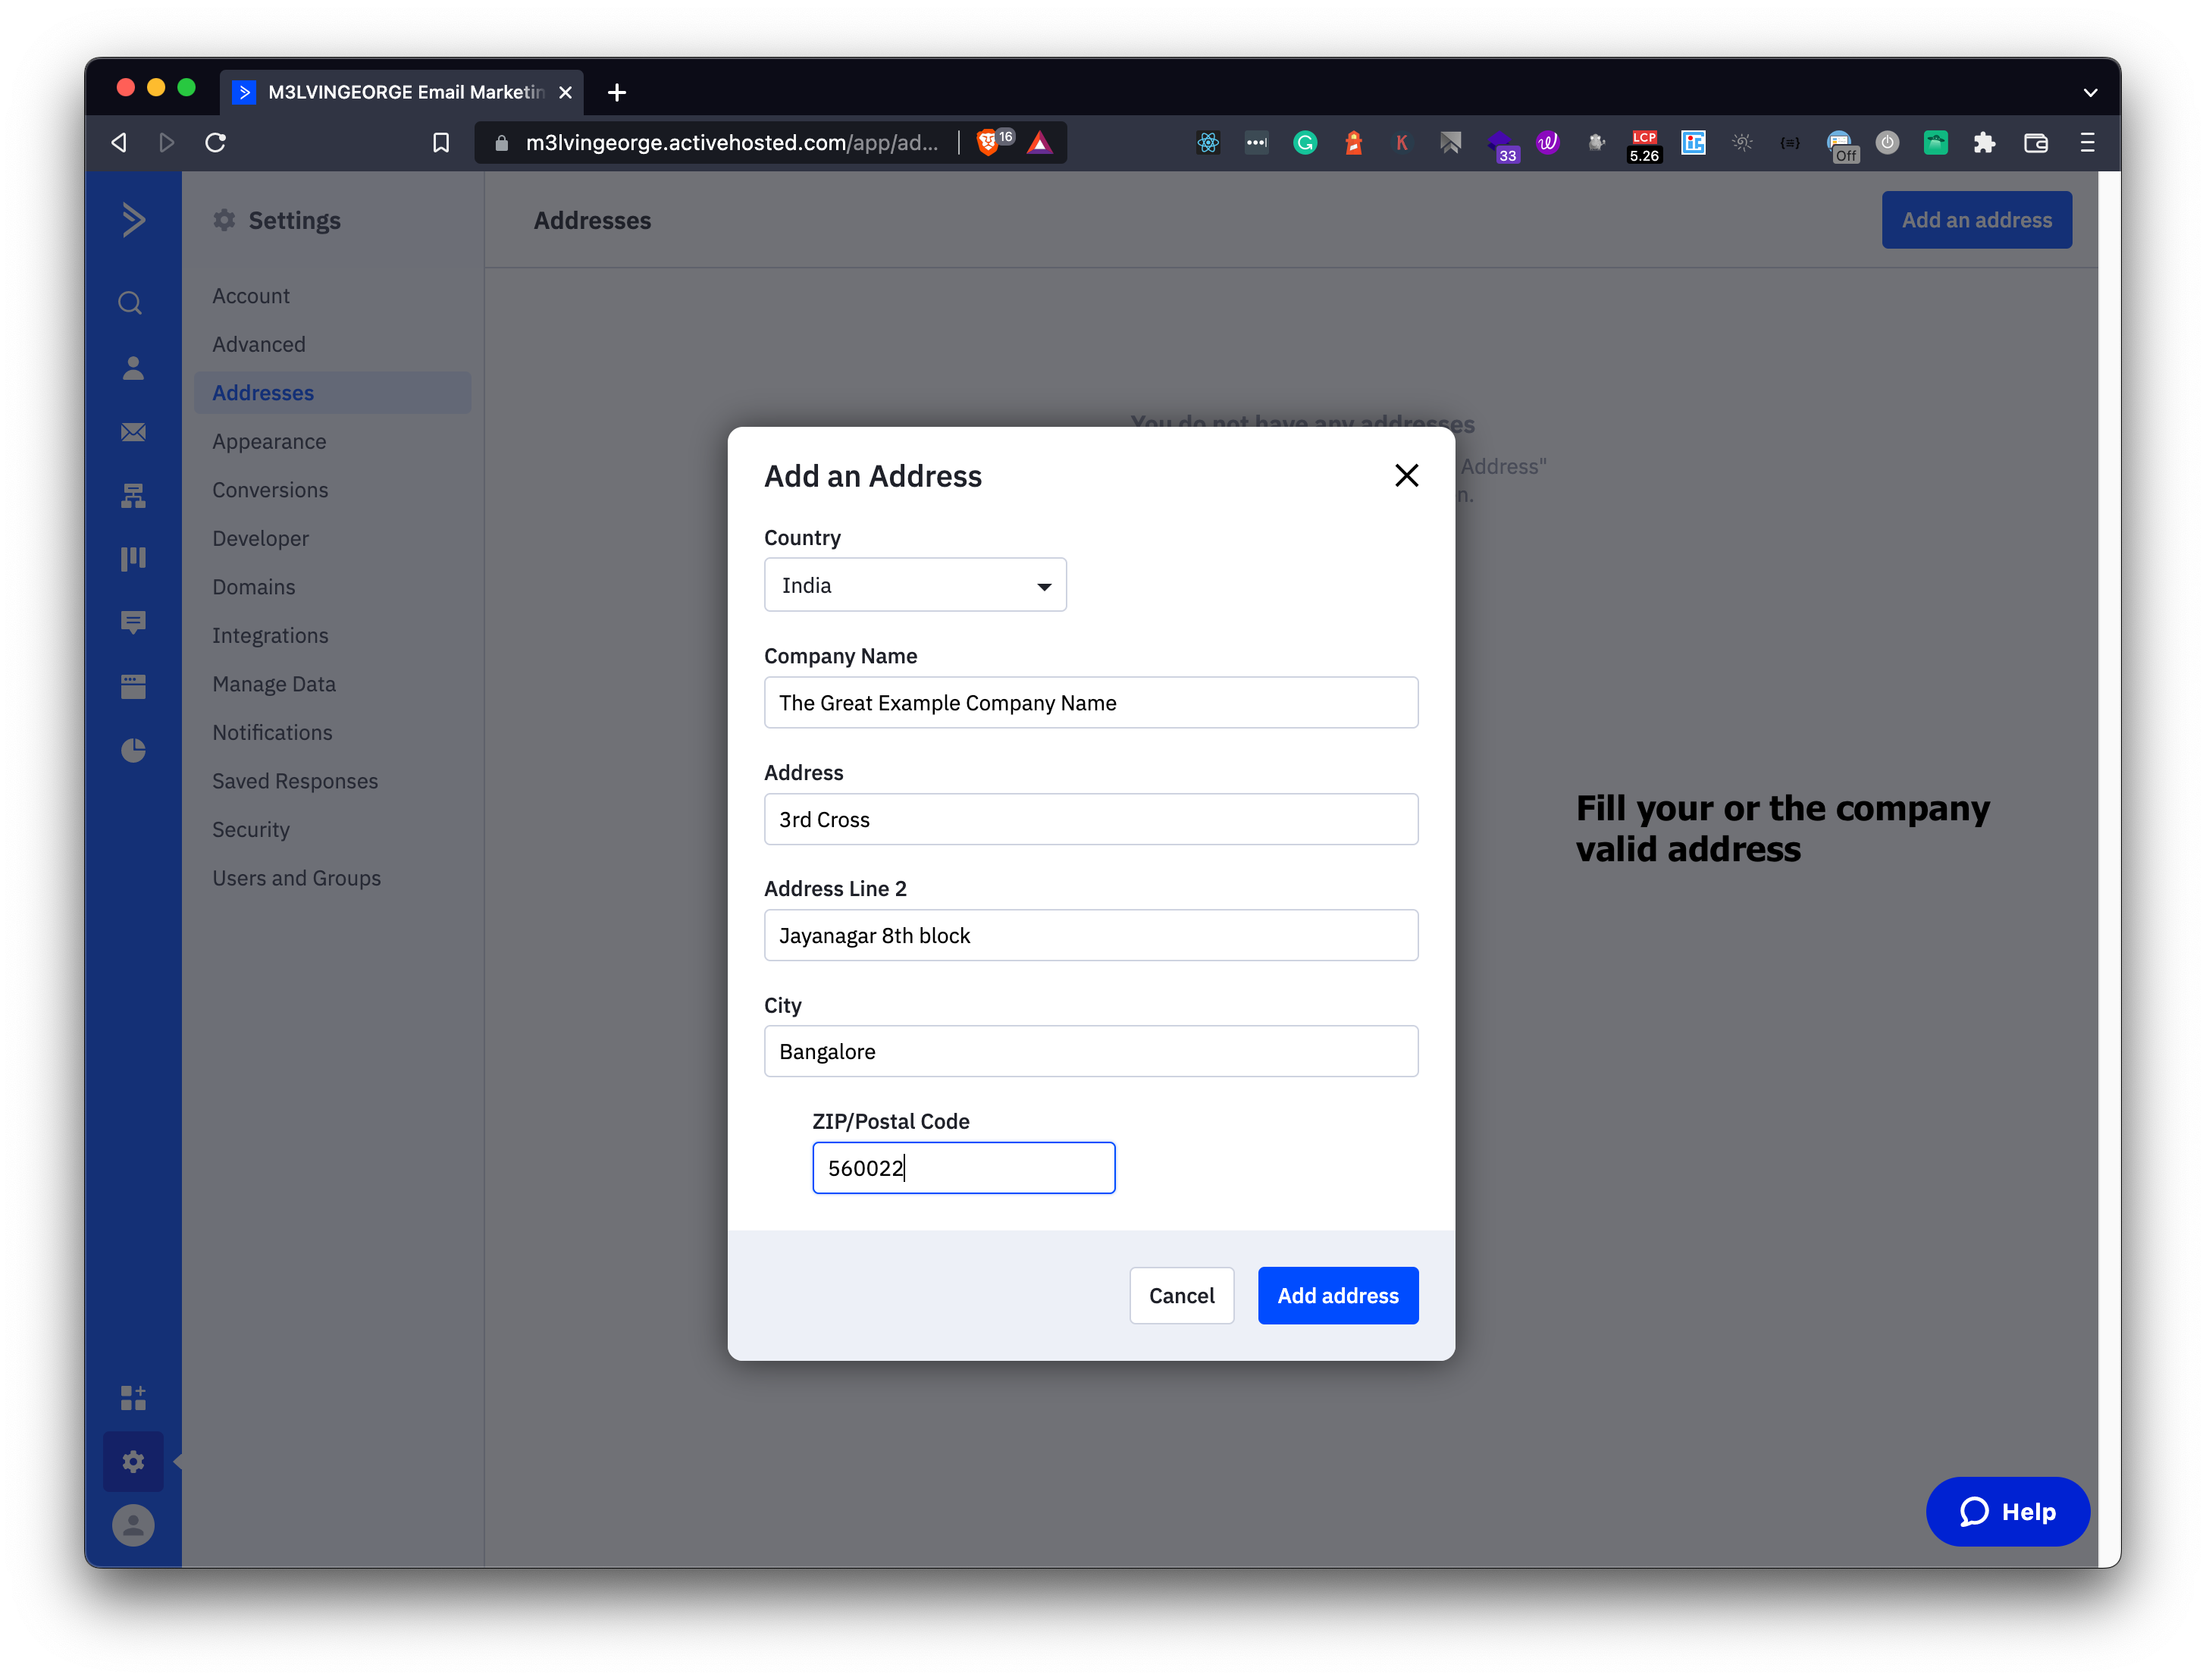
Click on Add Address button to save the address.
Step 3: Create your newsletter subscription form
To start creating a newsletter form first you need to click on the icon that says Website on the left of the ActiveCampaign dashboard.
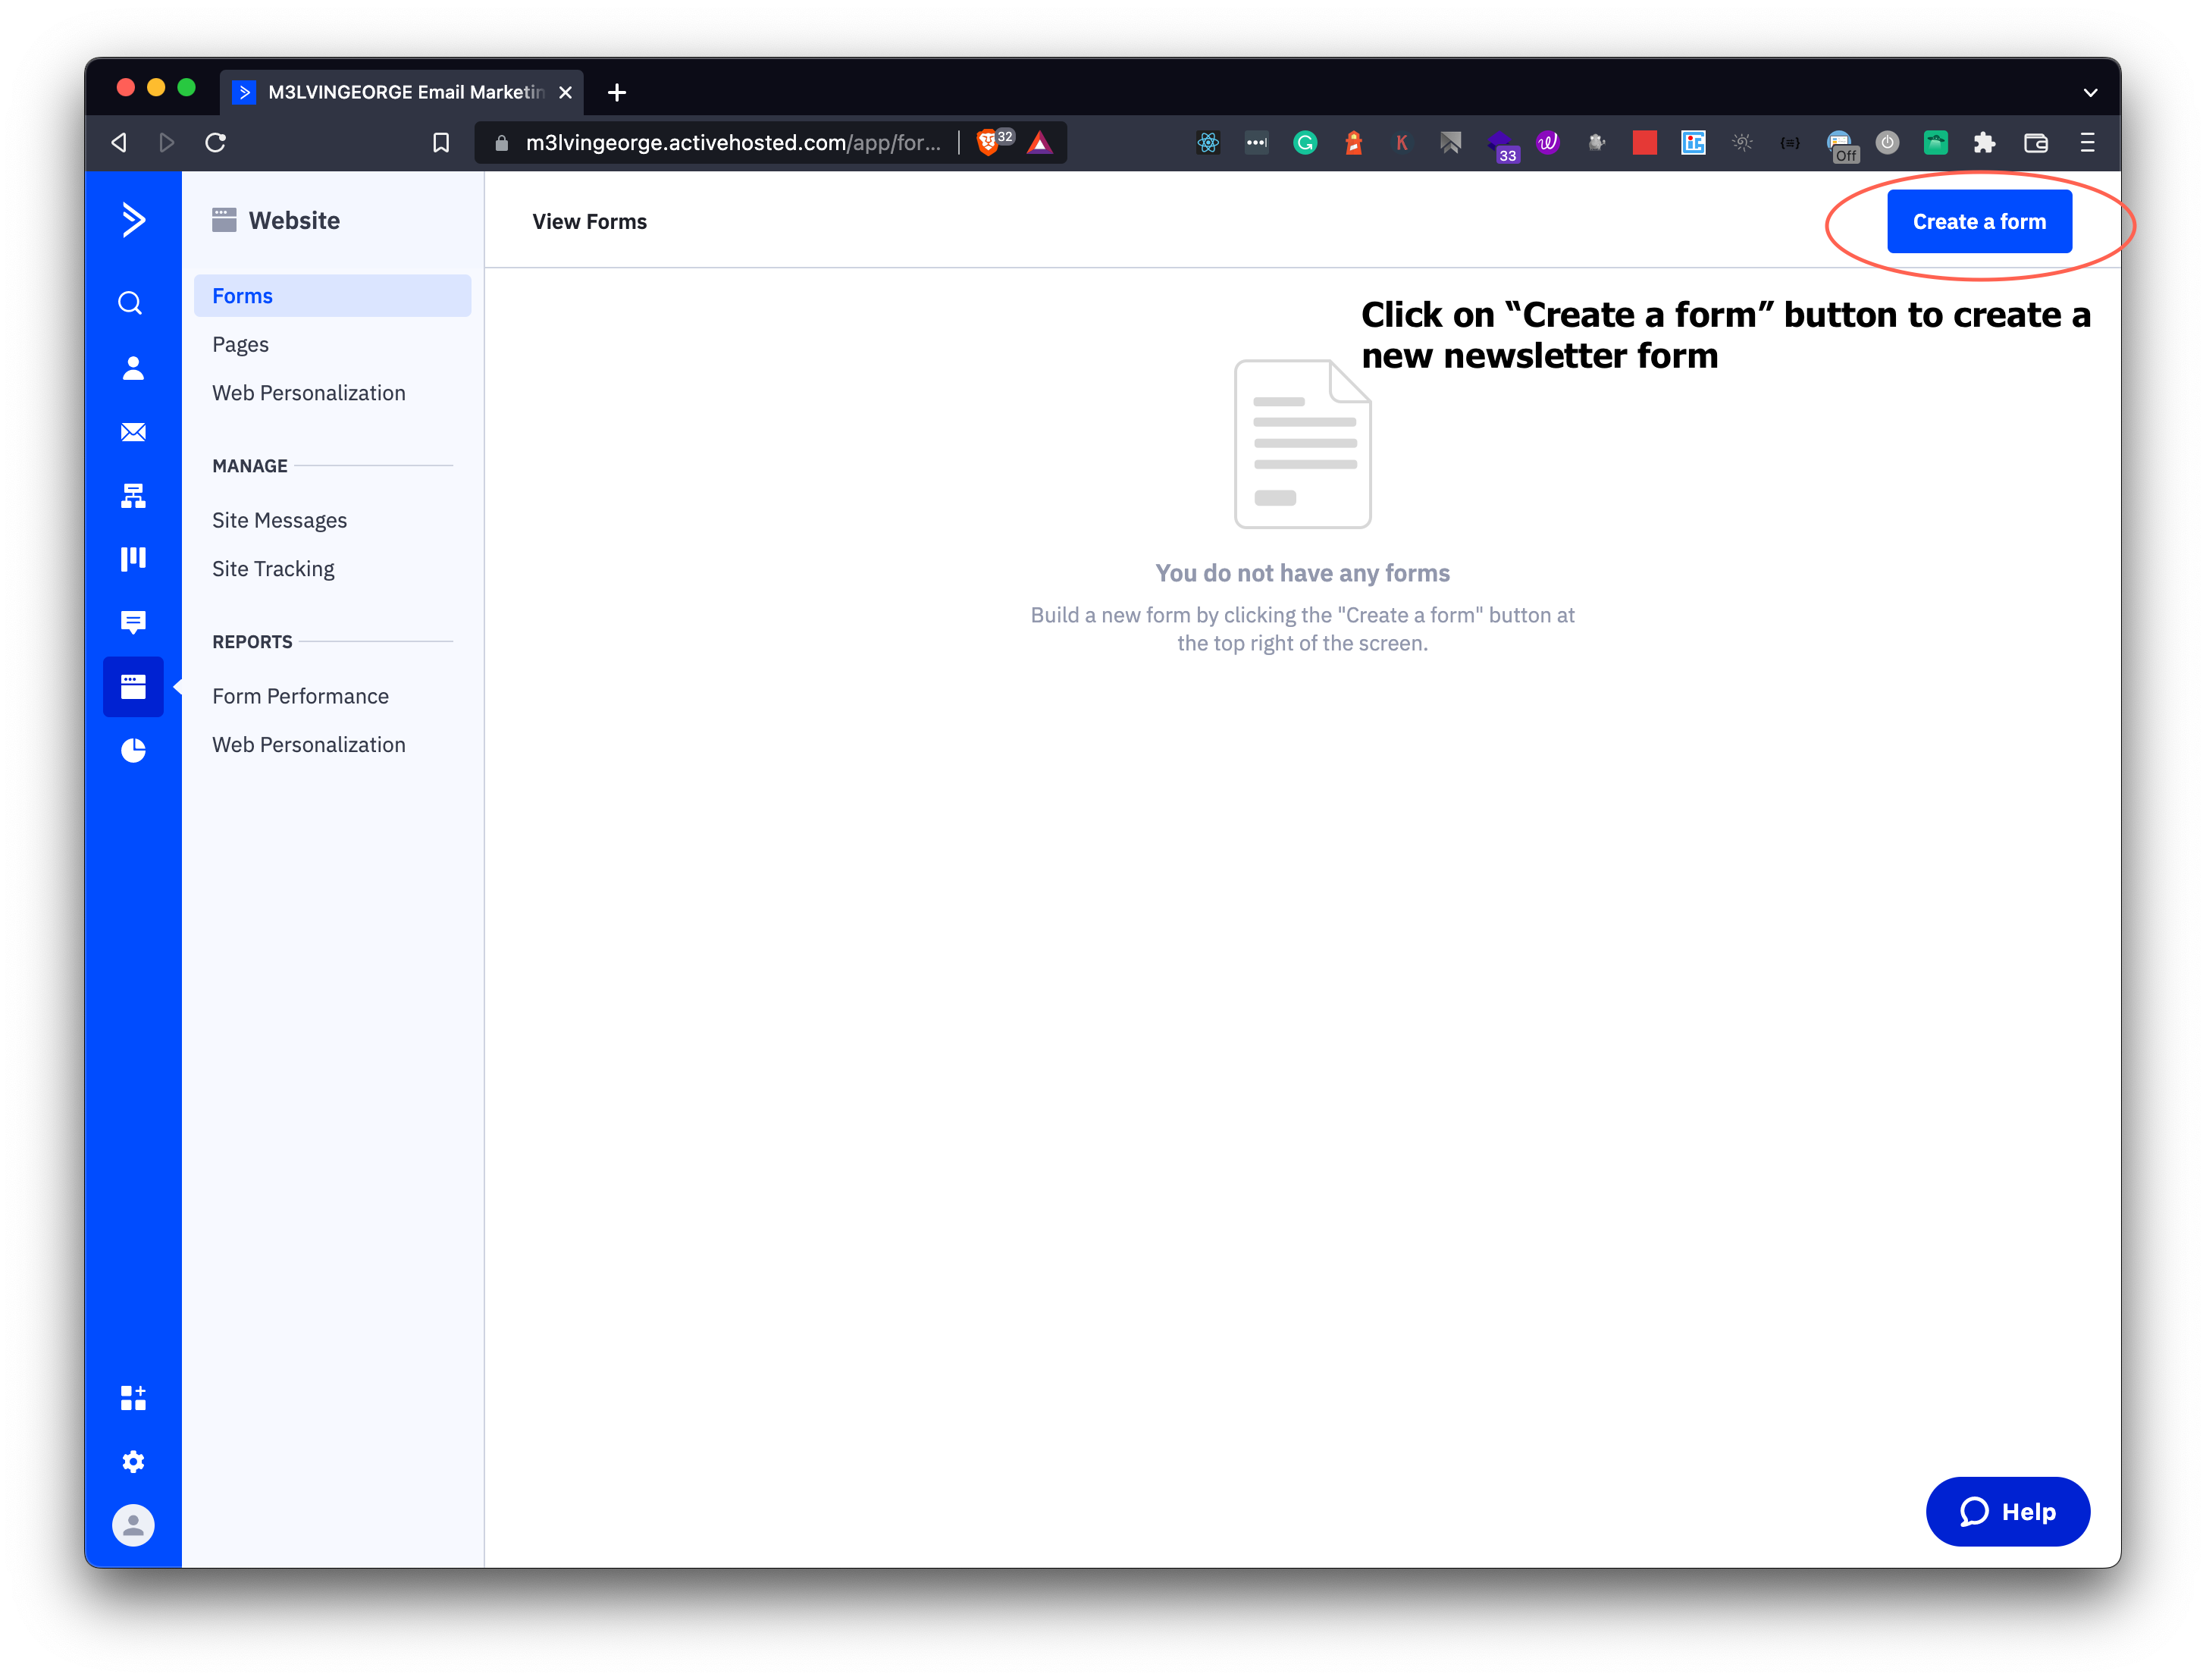
After clicking on the icon it will take you to a screen where you need to click on the tab called Forms and then click on the Create a form button on the top right corner of the screen like this,
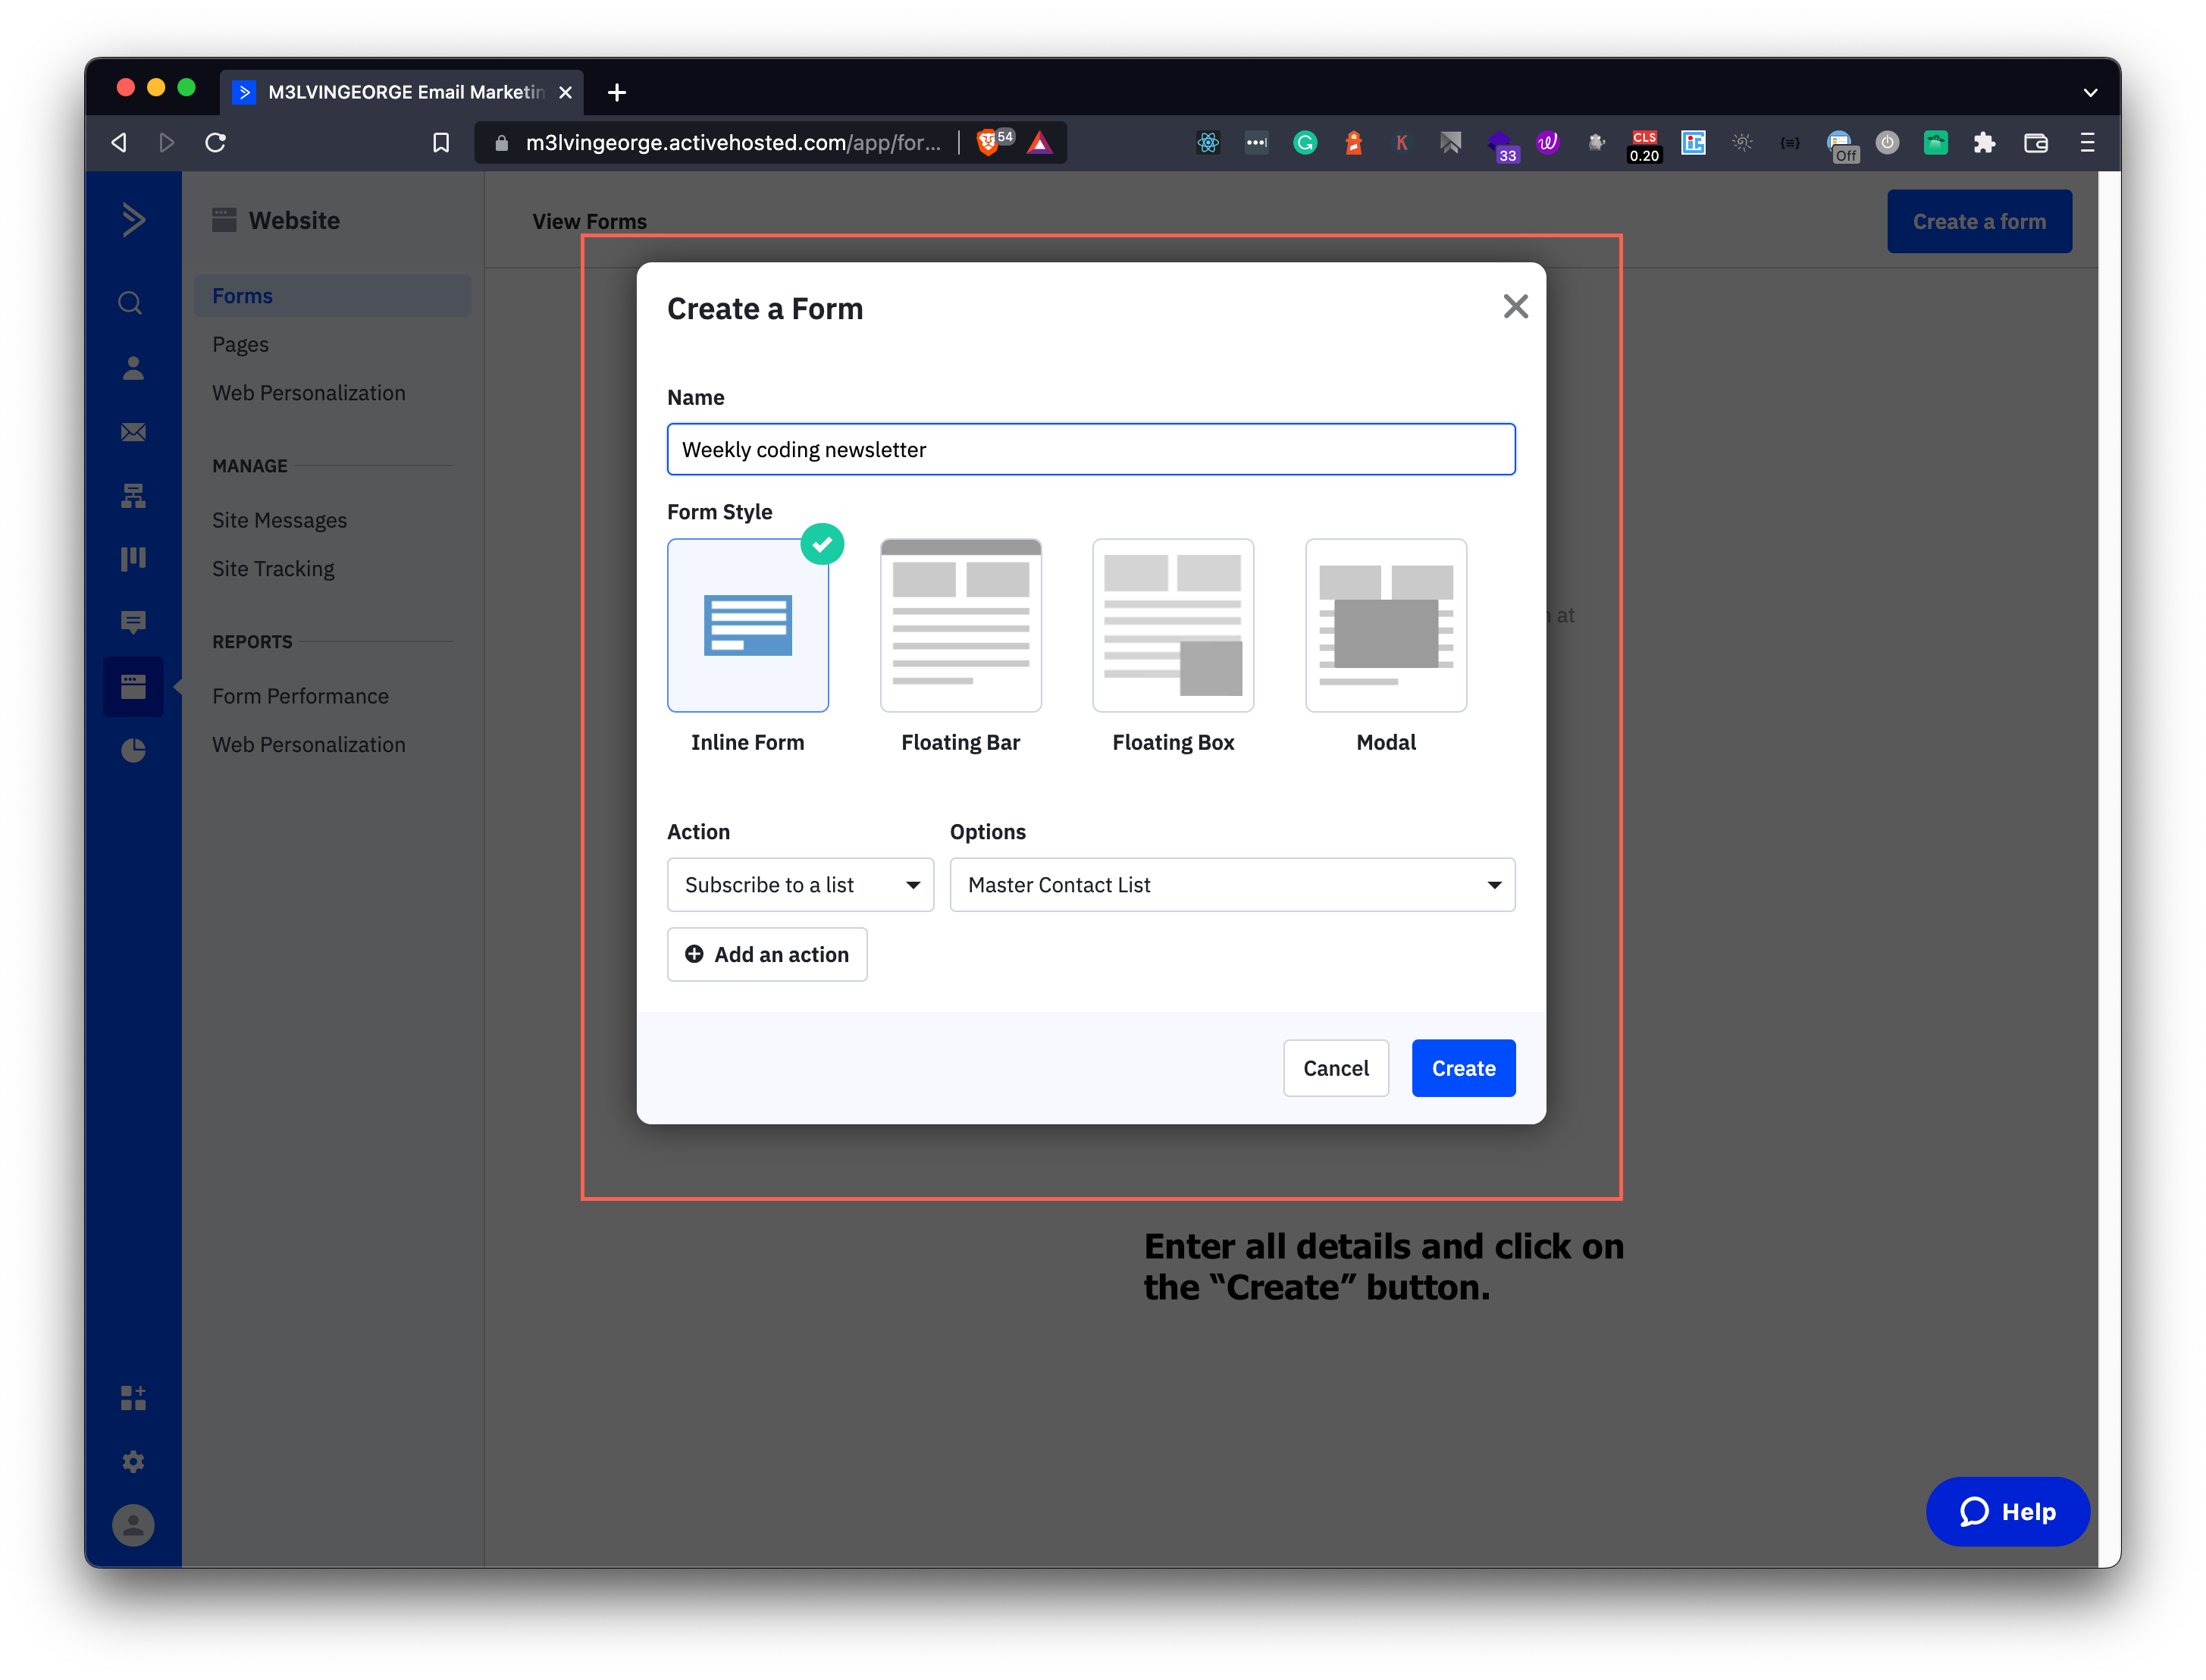
After clicking on the button you can see a popup asking for some important information like:
- Name of the newsletter form
- Style of the form that should be displayed on the website
- Action refers to the things that a user can do with the form
- Options refer to the event that should happen for a particular action.
In our case, We can name the newsletter as Weekly coding newsletter, the form style can be an Inline form since it will enable us to place the newsletter on any part of the website, the Action should be to subscribe the user to a list, so we can select the Subscribe to a list option from the dropdown and finally for the Options, we can select the list we want the user to be subscribed to when he submits the details for the subscription. We can select the Master Contact List since we only have one list as of now. You can create as many lists and manage them accordingly.
After entering the information, you can click on the Create blue button to create the form.
It may look like this,
After clicking on the Create button you will be taken to a UI editor where you can now design the UI of the newsletter form that will be shown to the users on our website.
It may look like this,
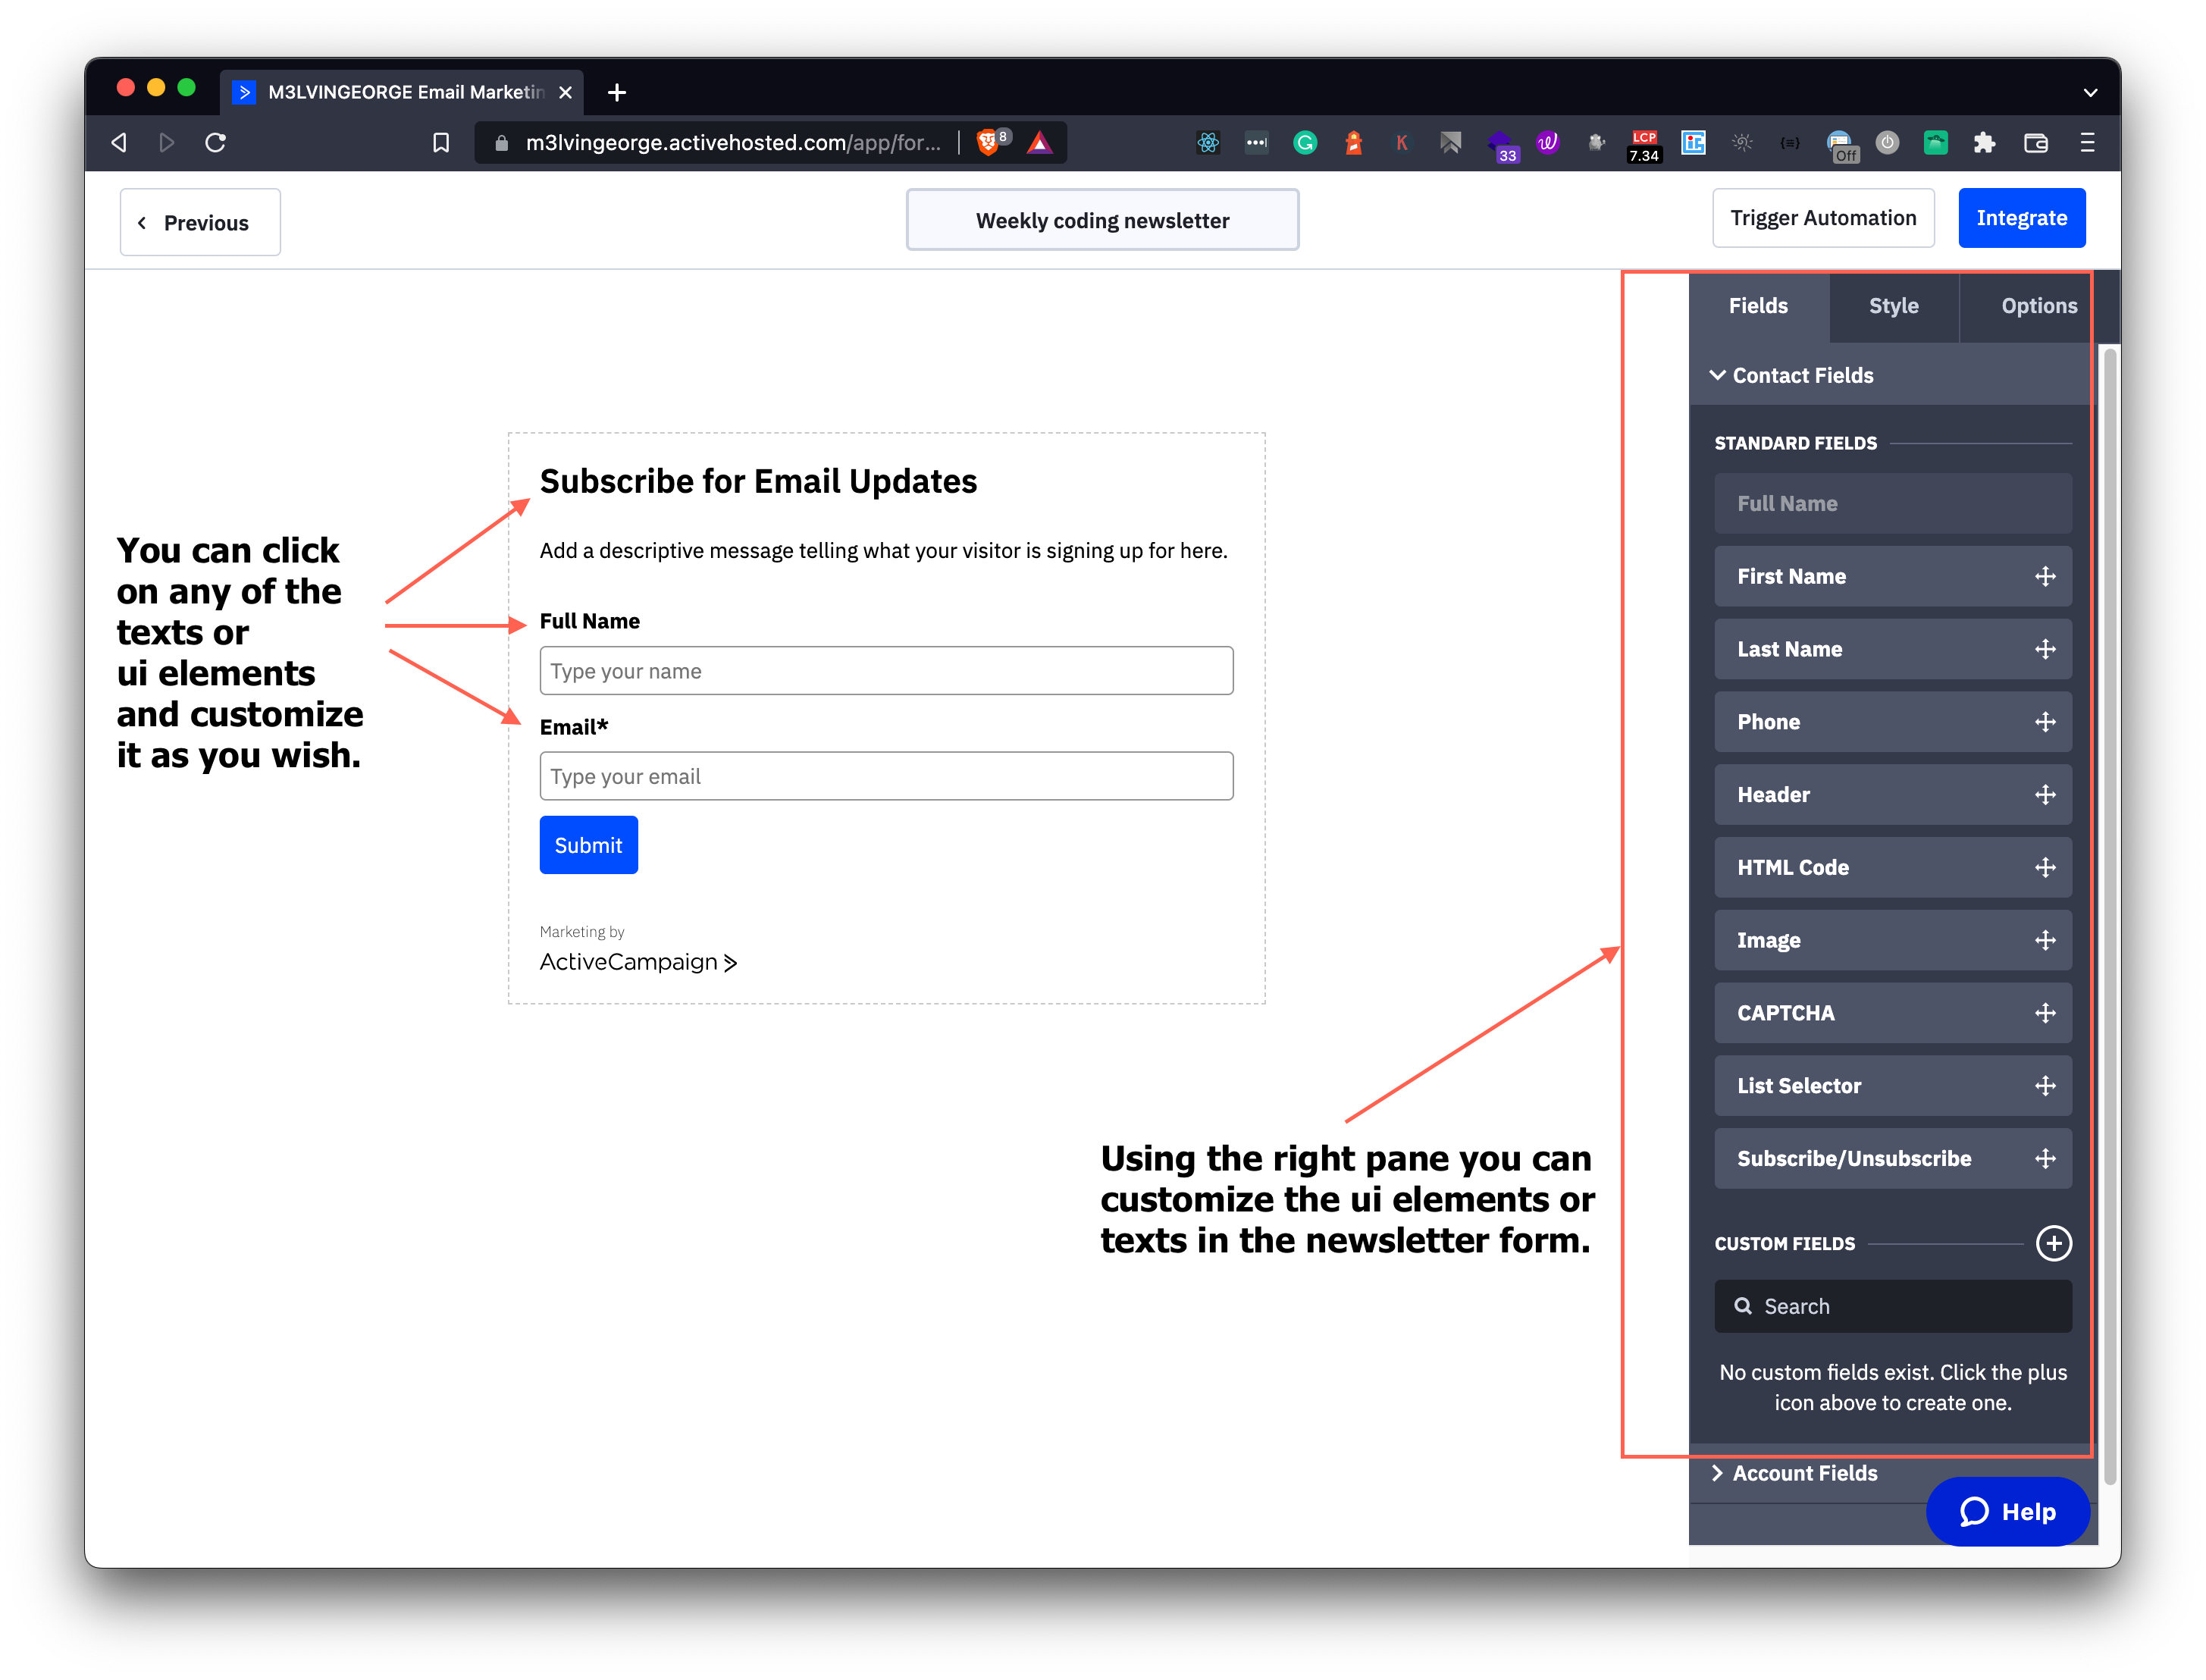
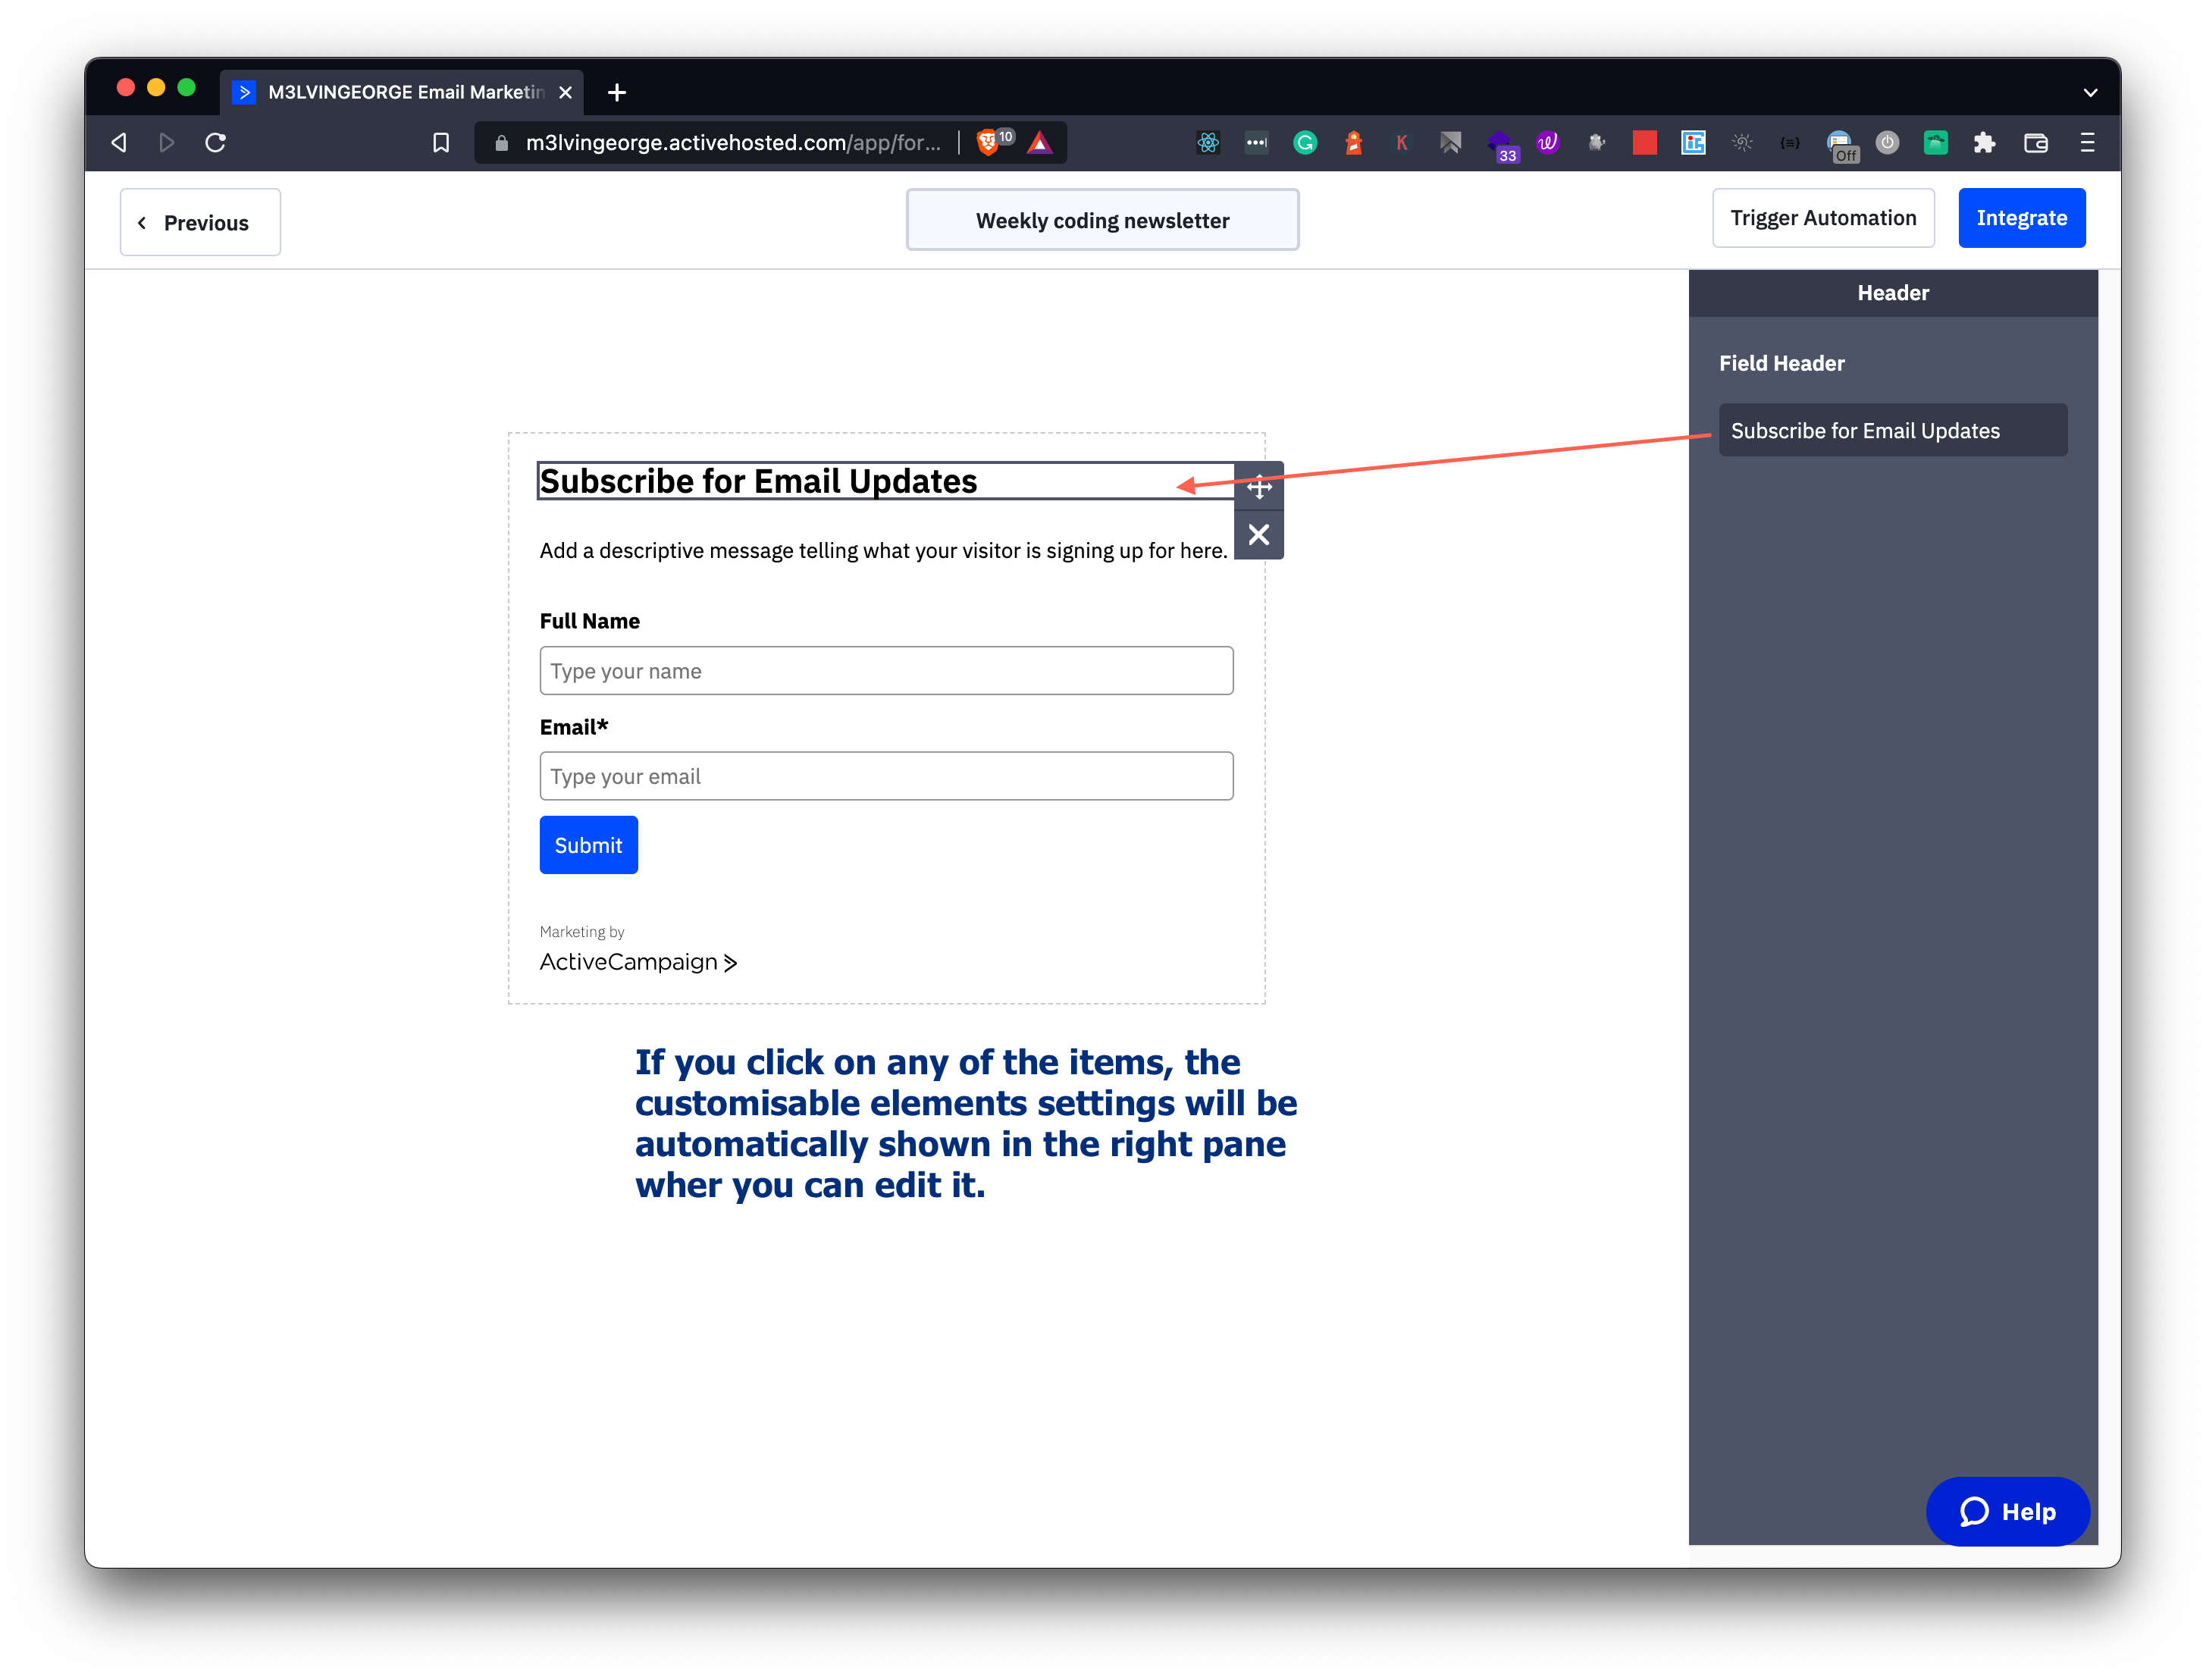
You can click on any of the items in the UI editor and then the related customizable elements will be automatically shown in the right pane where you can edit them.
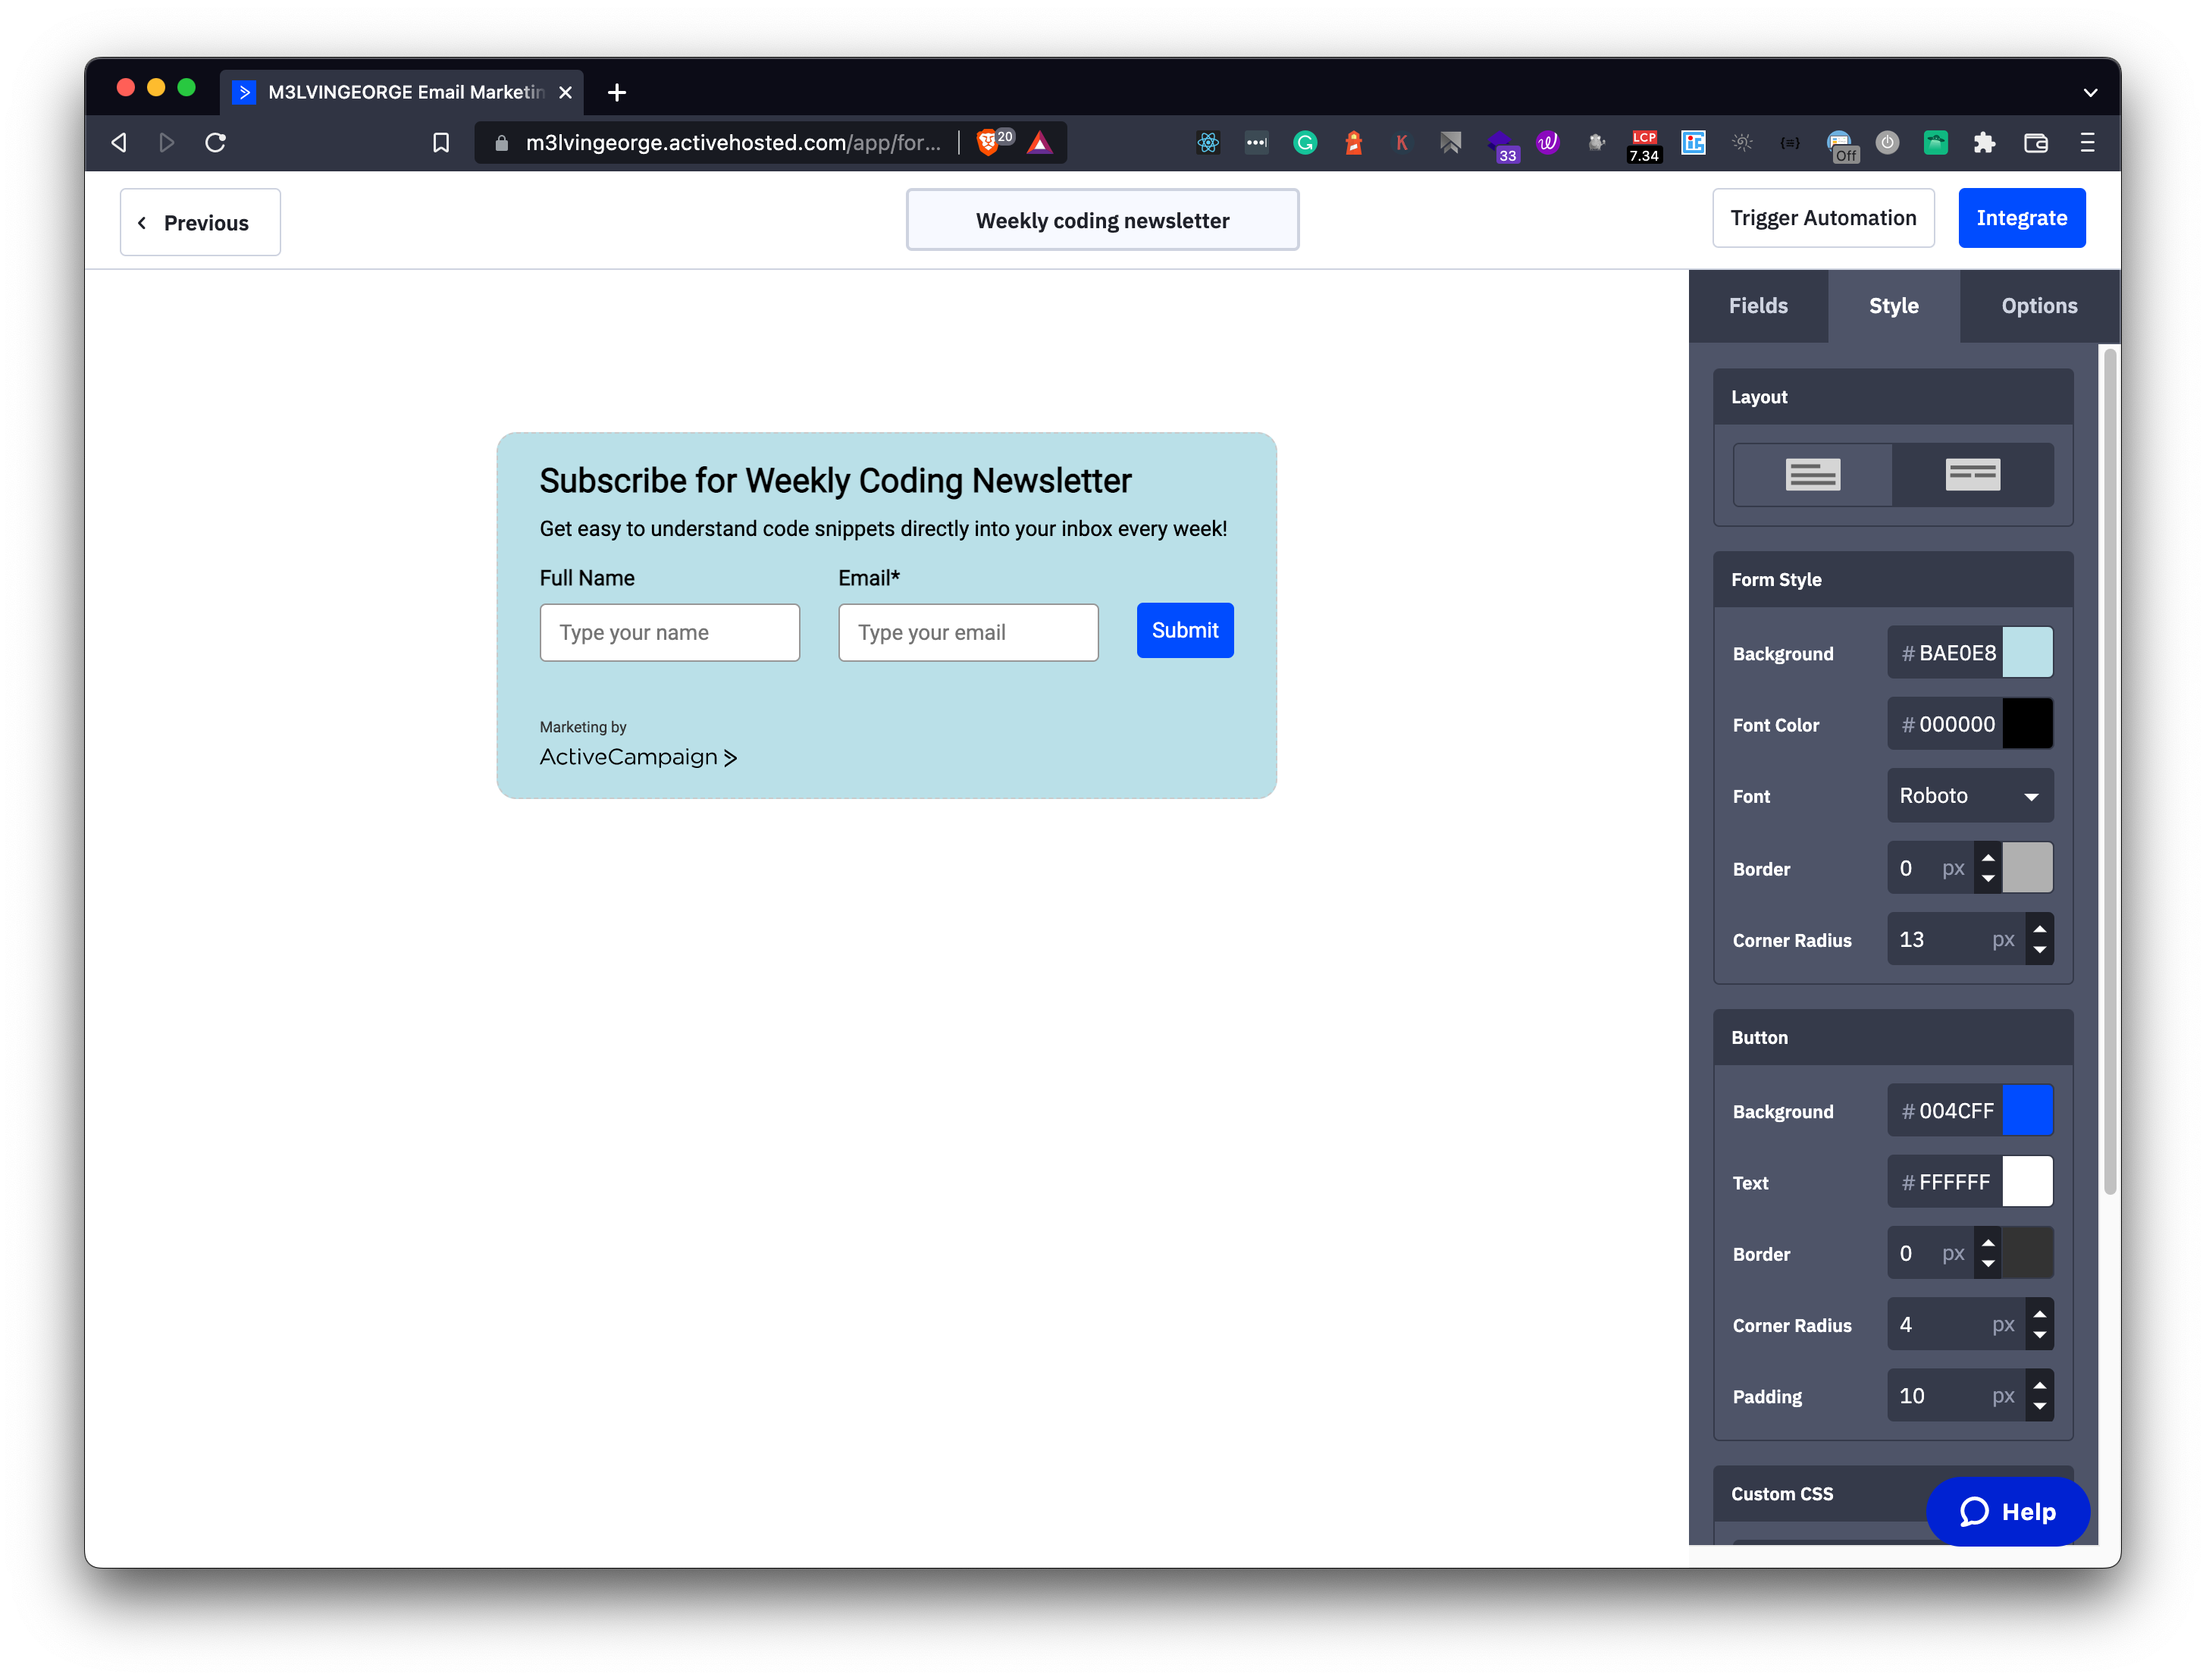
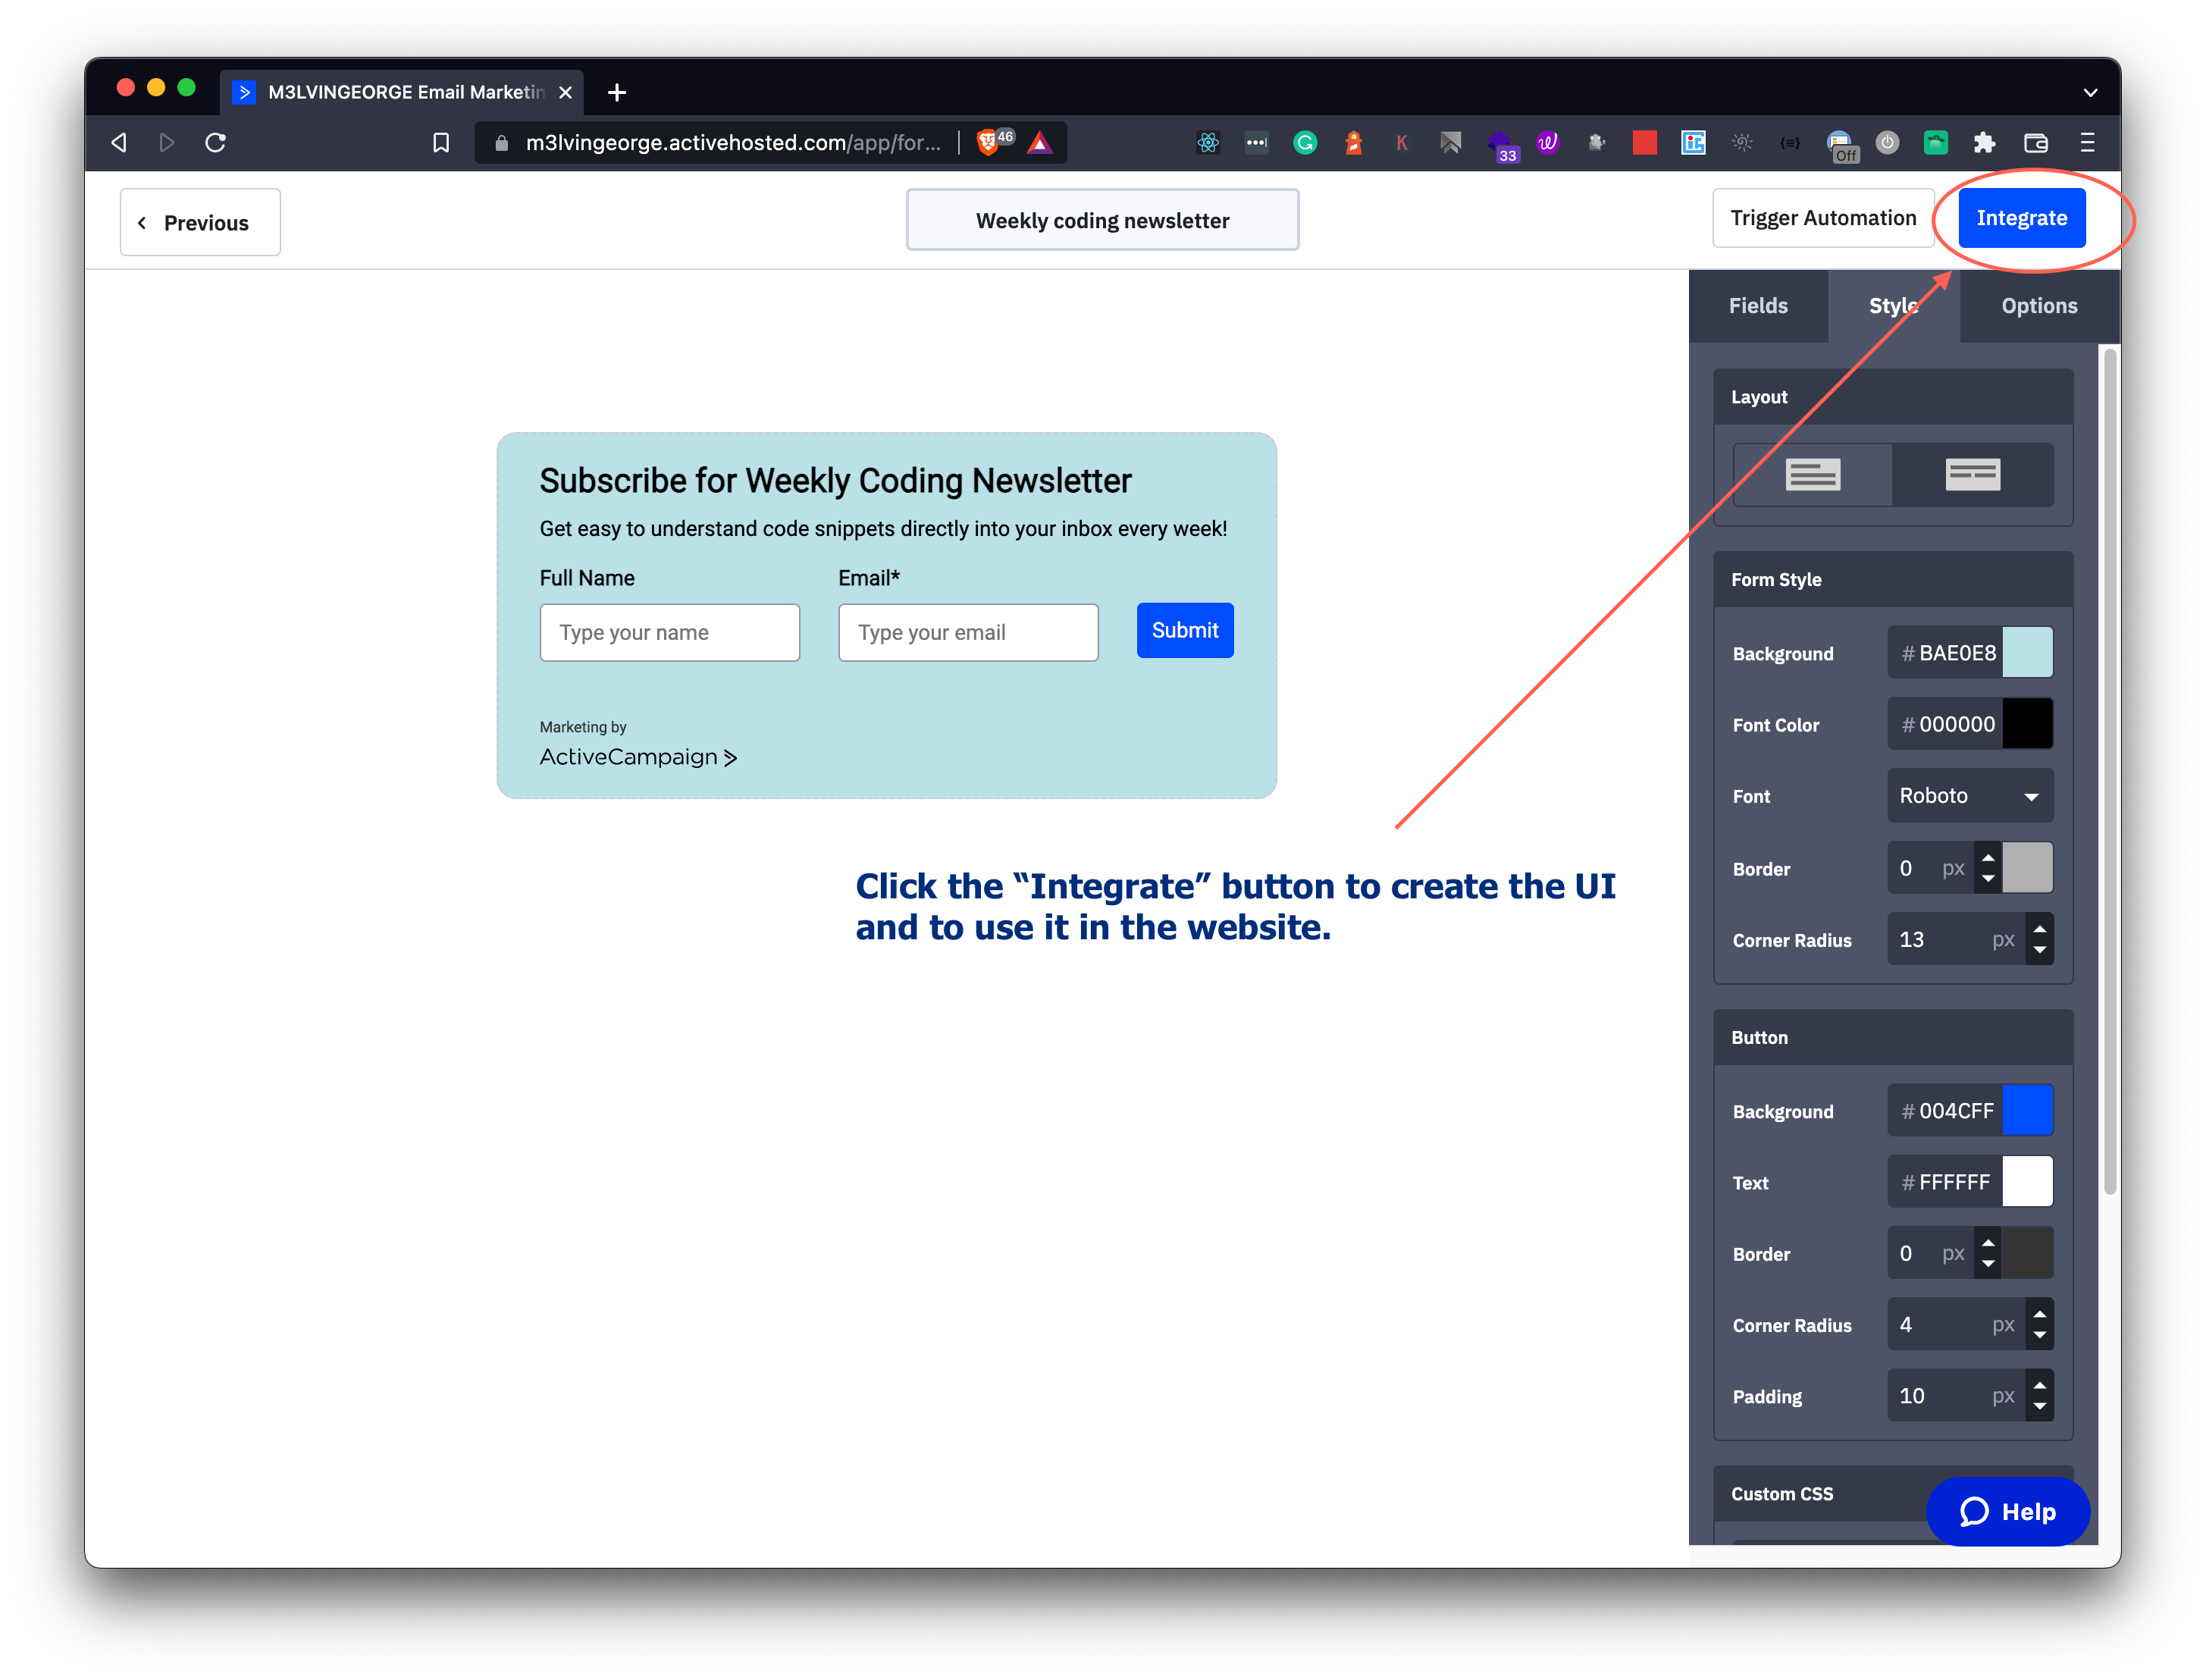
An example image of a finalized UI for the newsletter form is shown below,
Finally, to create the UI and use it on our website, you can click on the Integrate button on the top-right corner of the screen,
Step 4: Integrate the newsletter with your website
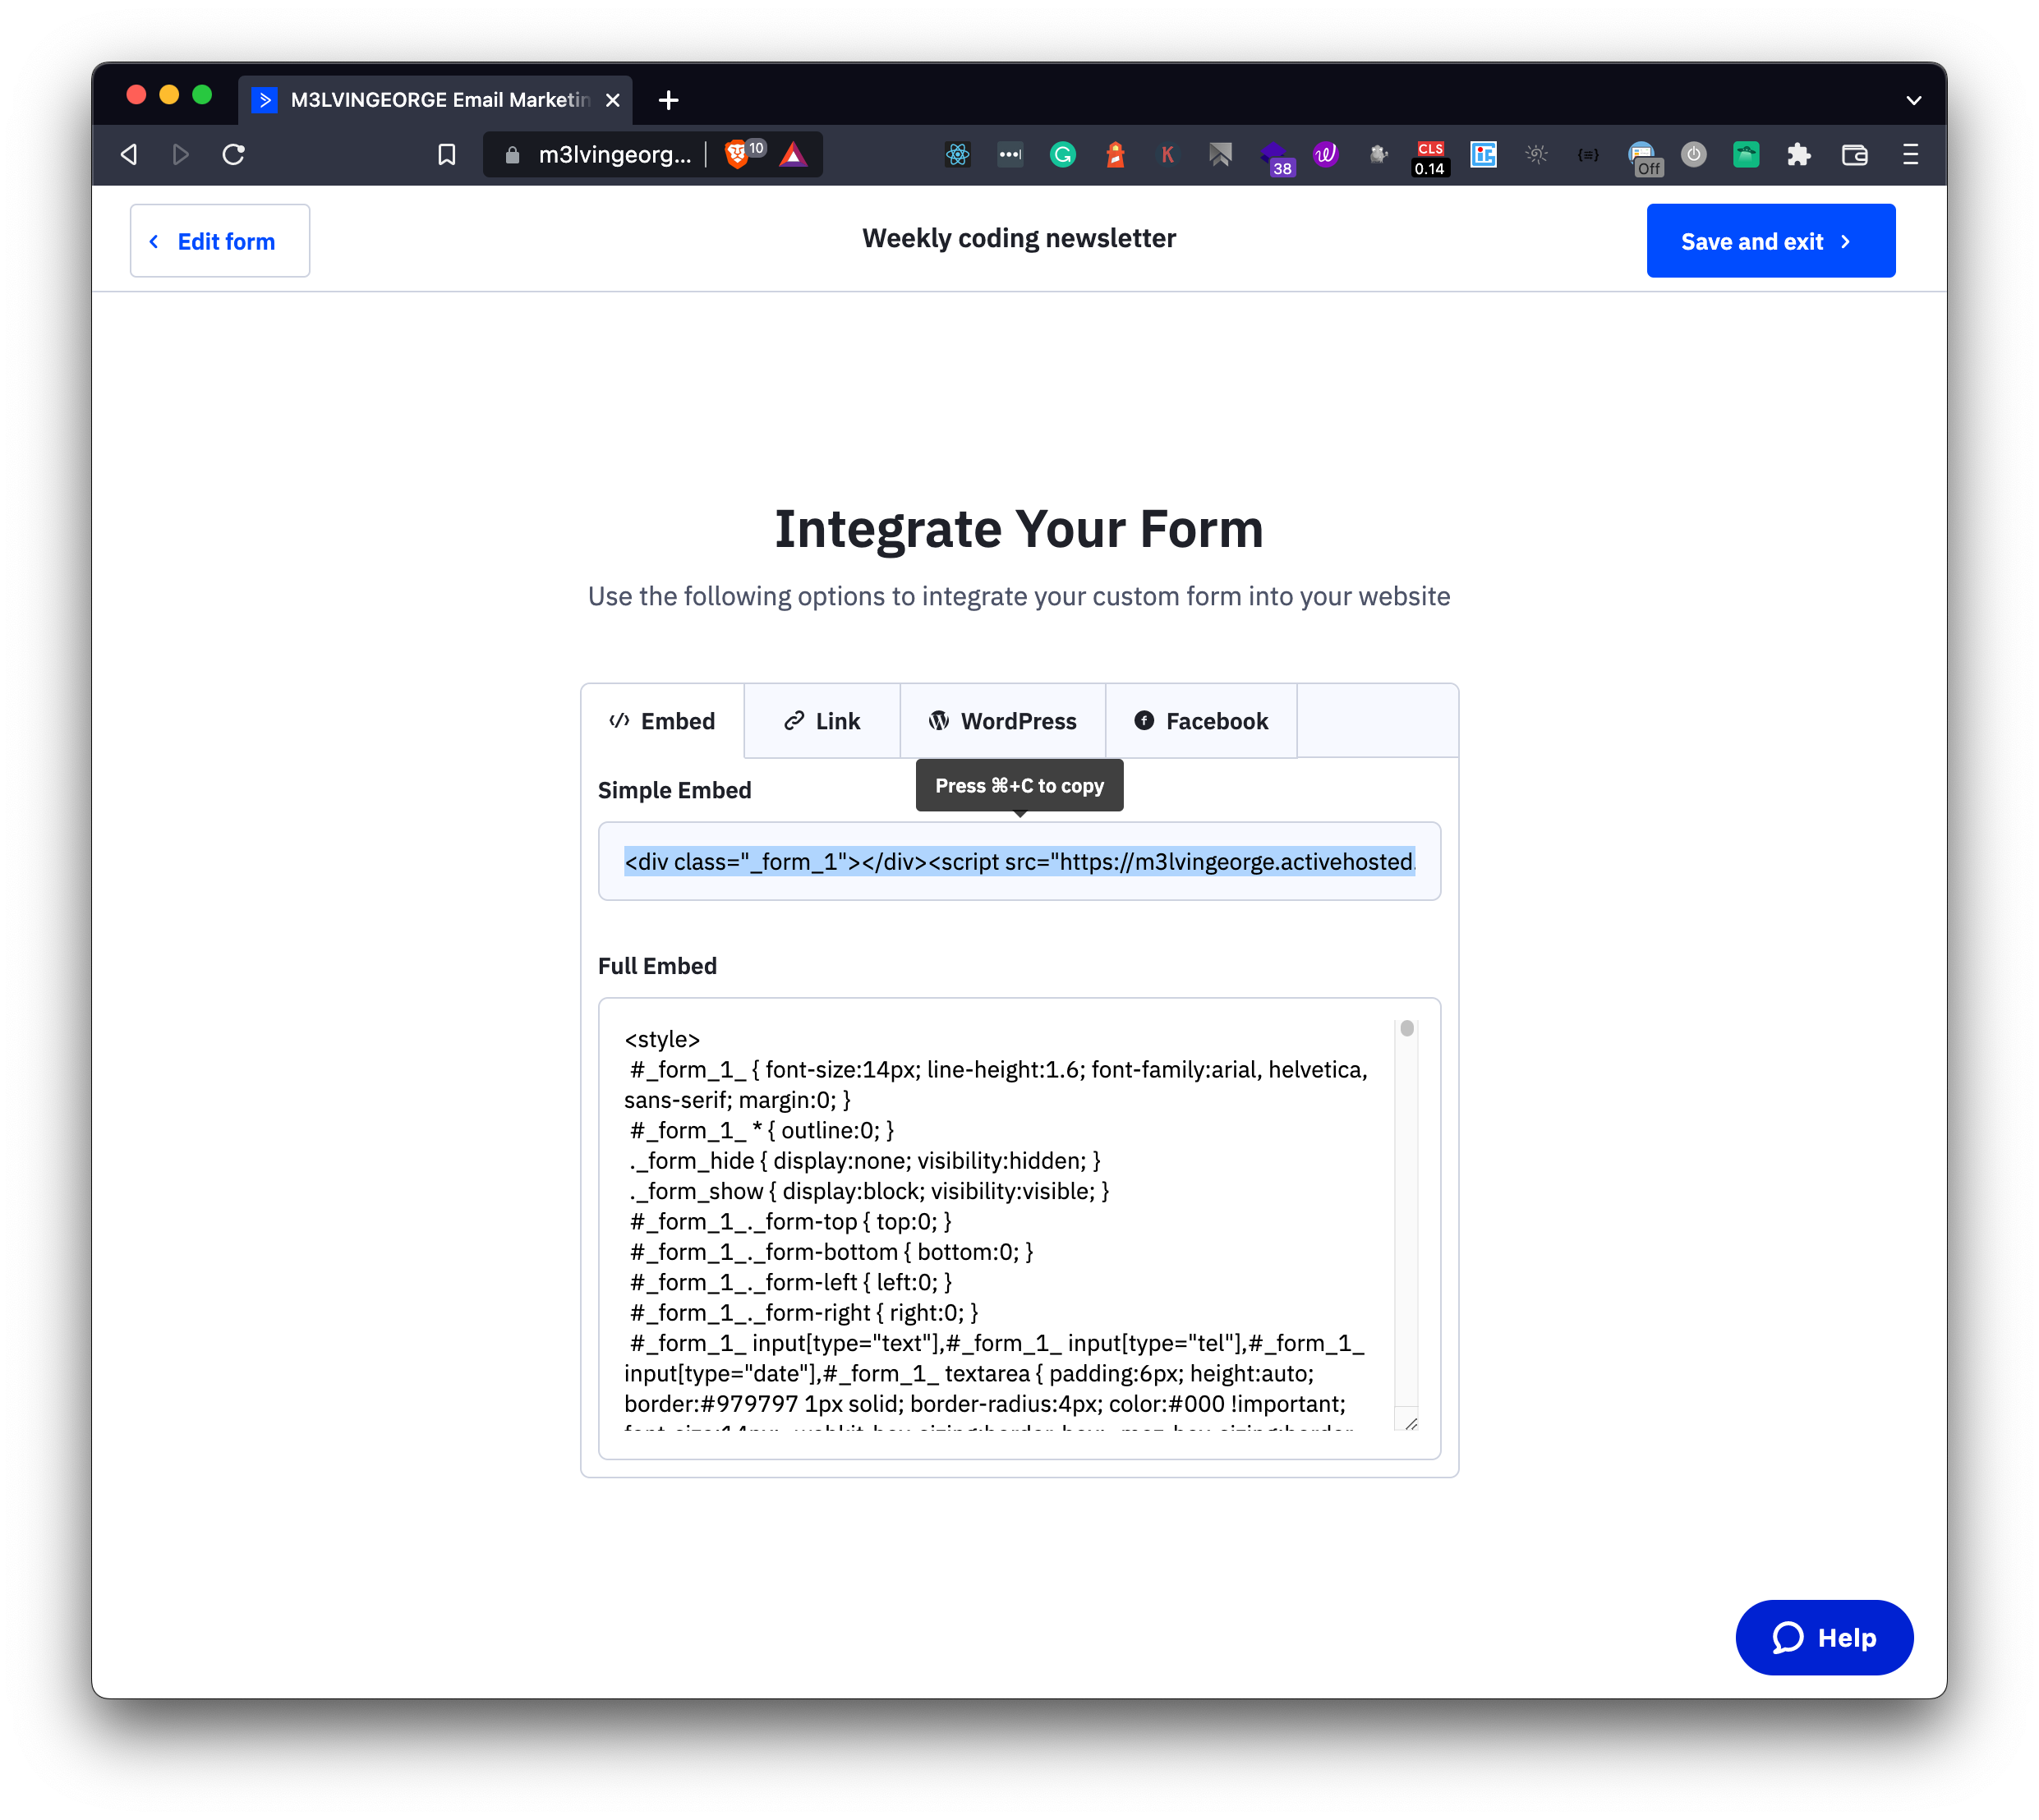
After clicking on the Integrate button, you will be taken to a screen where you can see many options to show the newly created newsletter to the users.
We can integrate it in either of the following ways:
- In your website by copying embed code and pasting it wherever it is required
- Using a direct link, when navigated will show the newsletter you created
- In your WordPress website, using a plugin
- On our Facebook page
We will be following the first method of copying and then pasting the embed code on the website.
The screen will look like this,
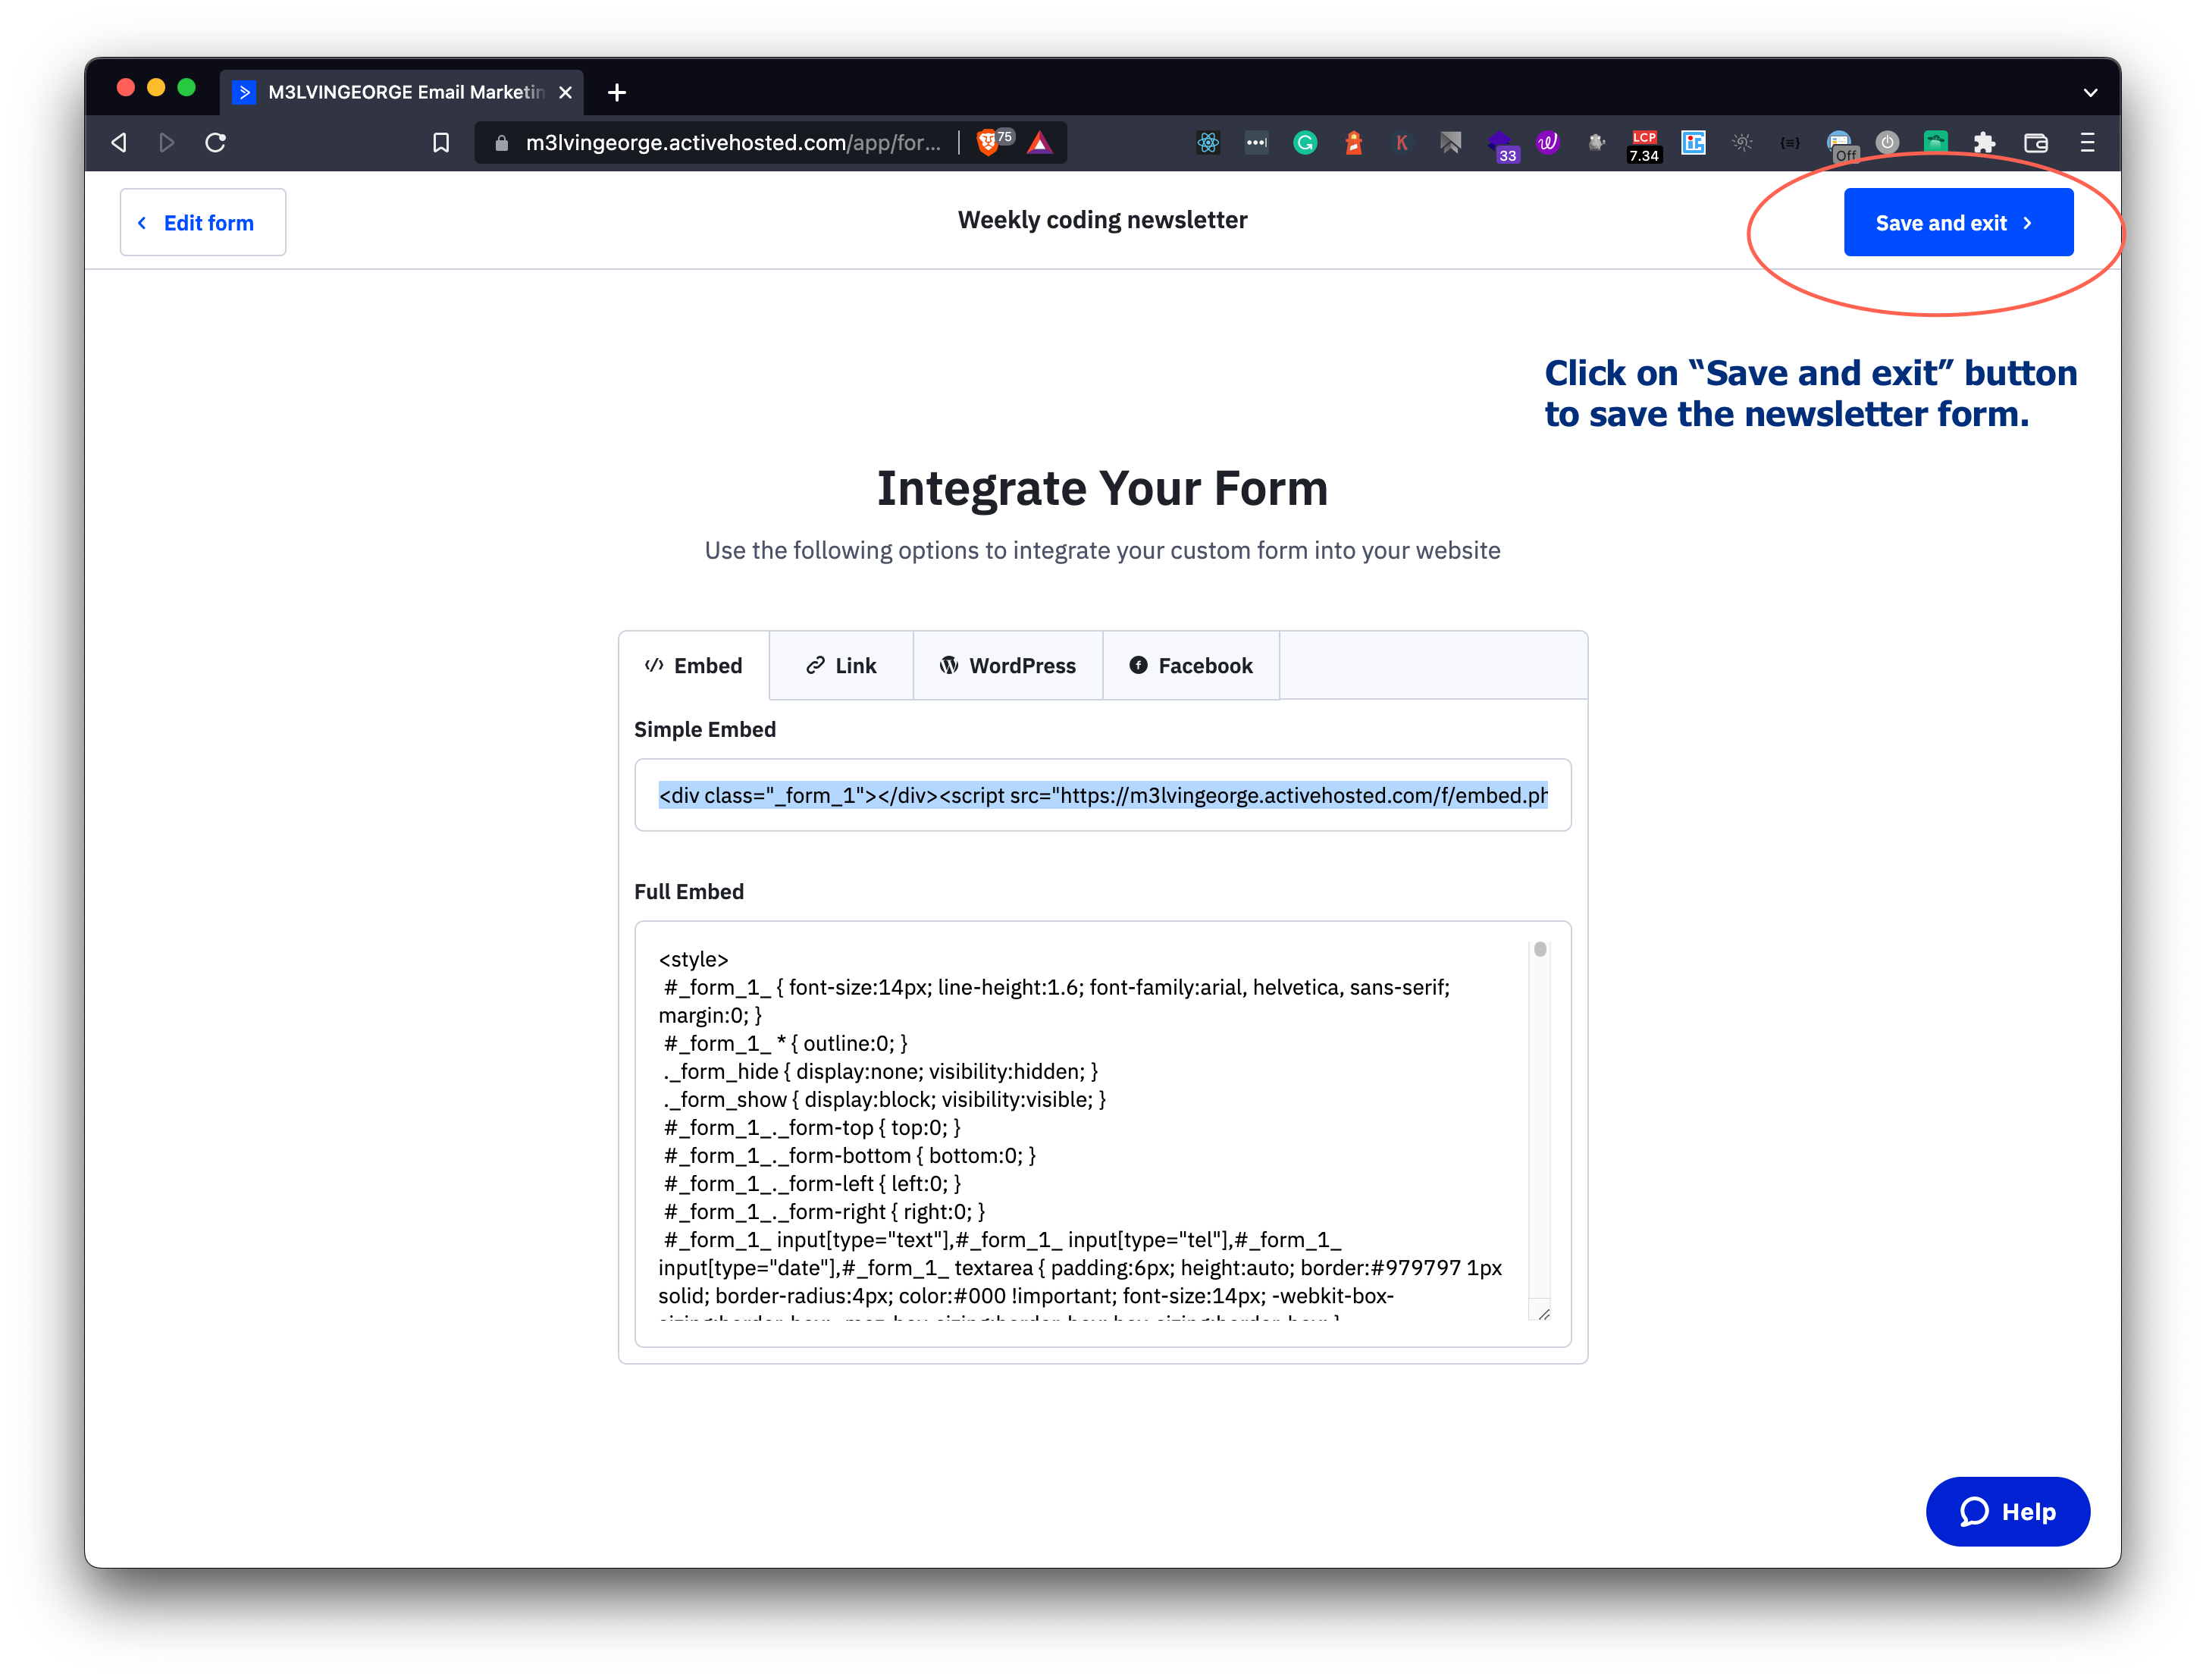
Finally, you need to click on the Save and exit button on the top-right corner of the screen to save the newsletter completely,
Now you need to paste the code into the website HTML code,

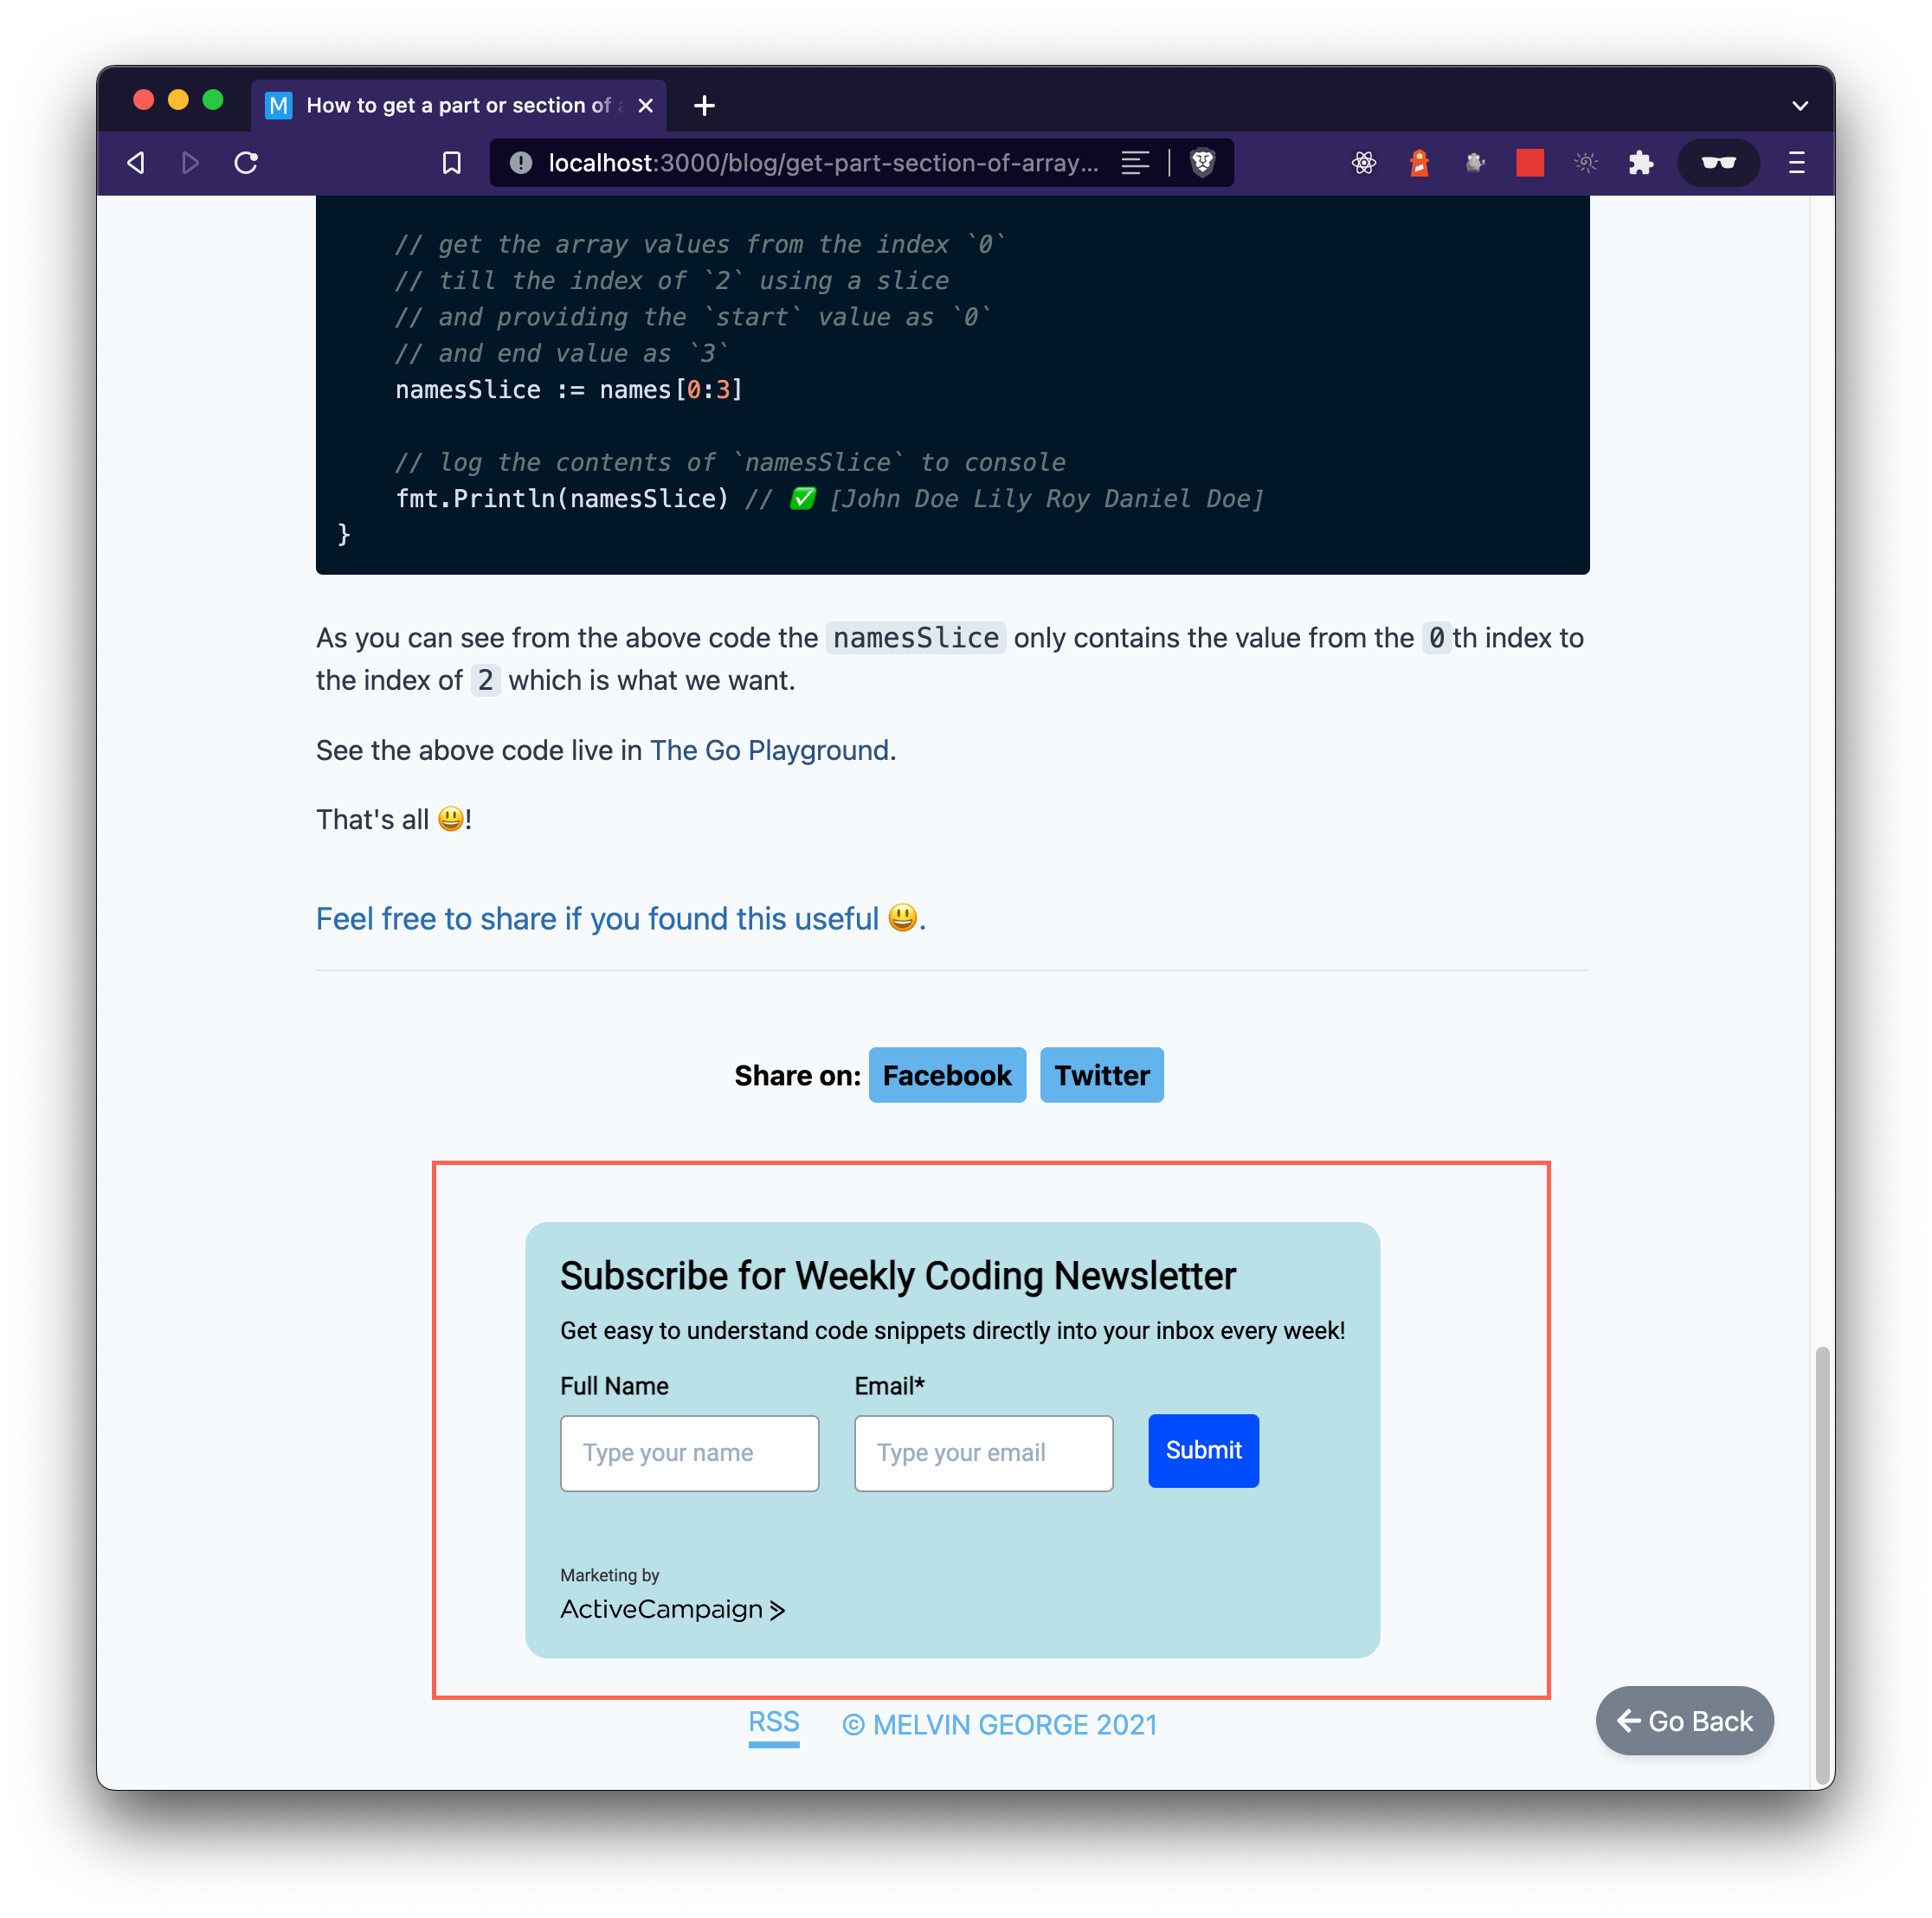
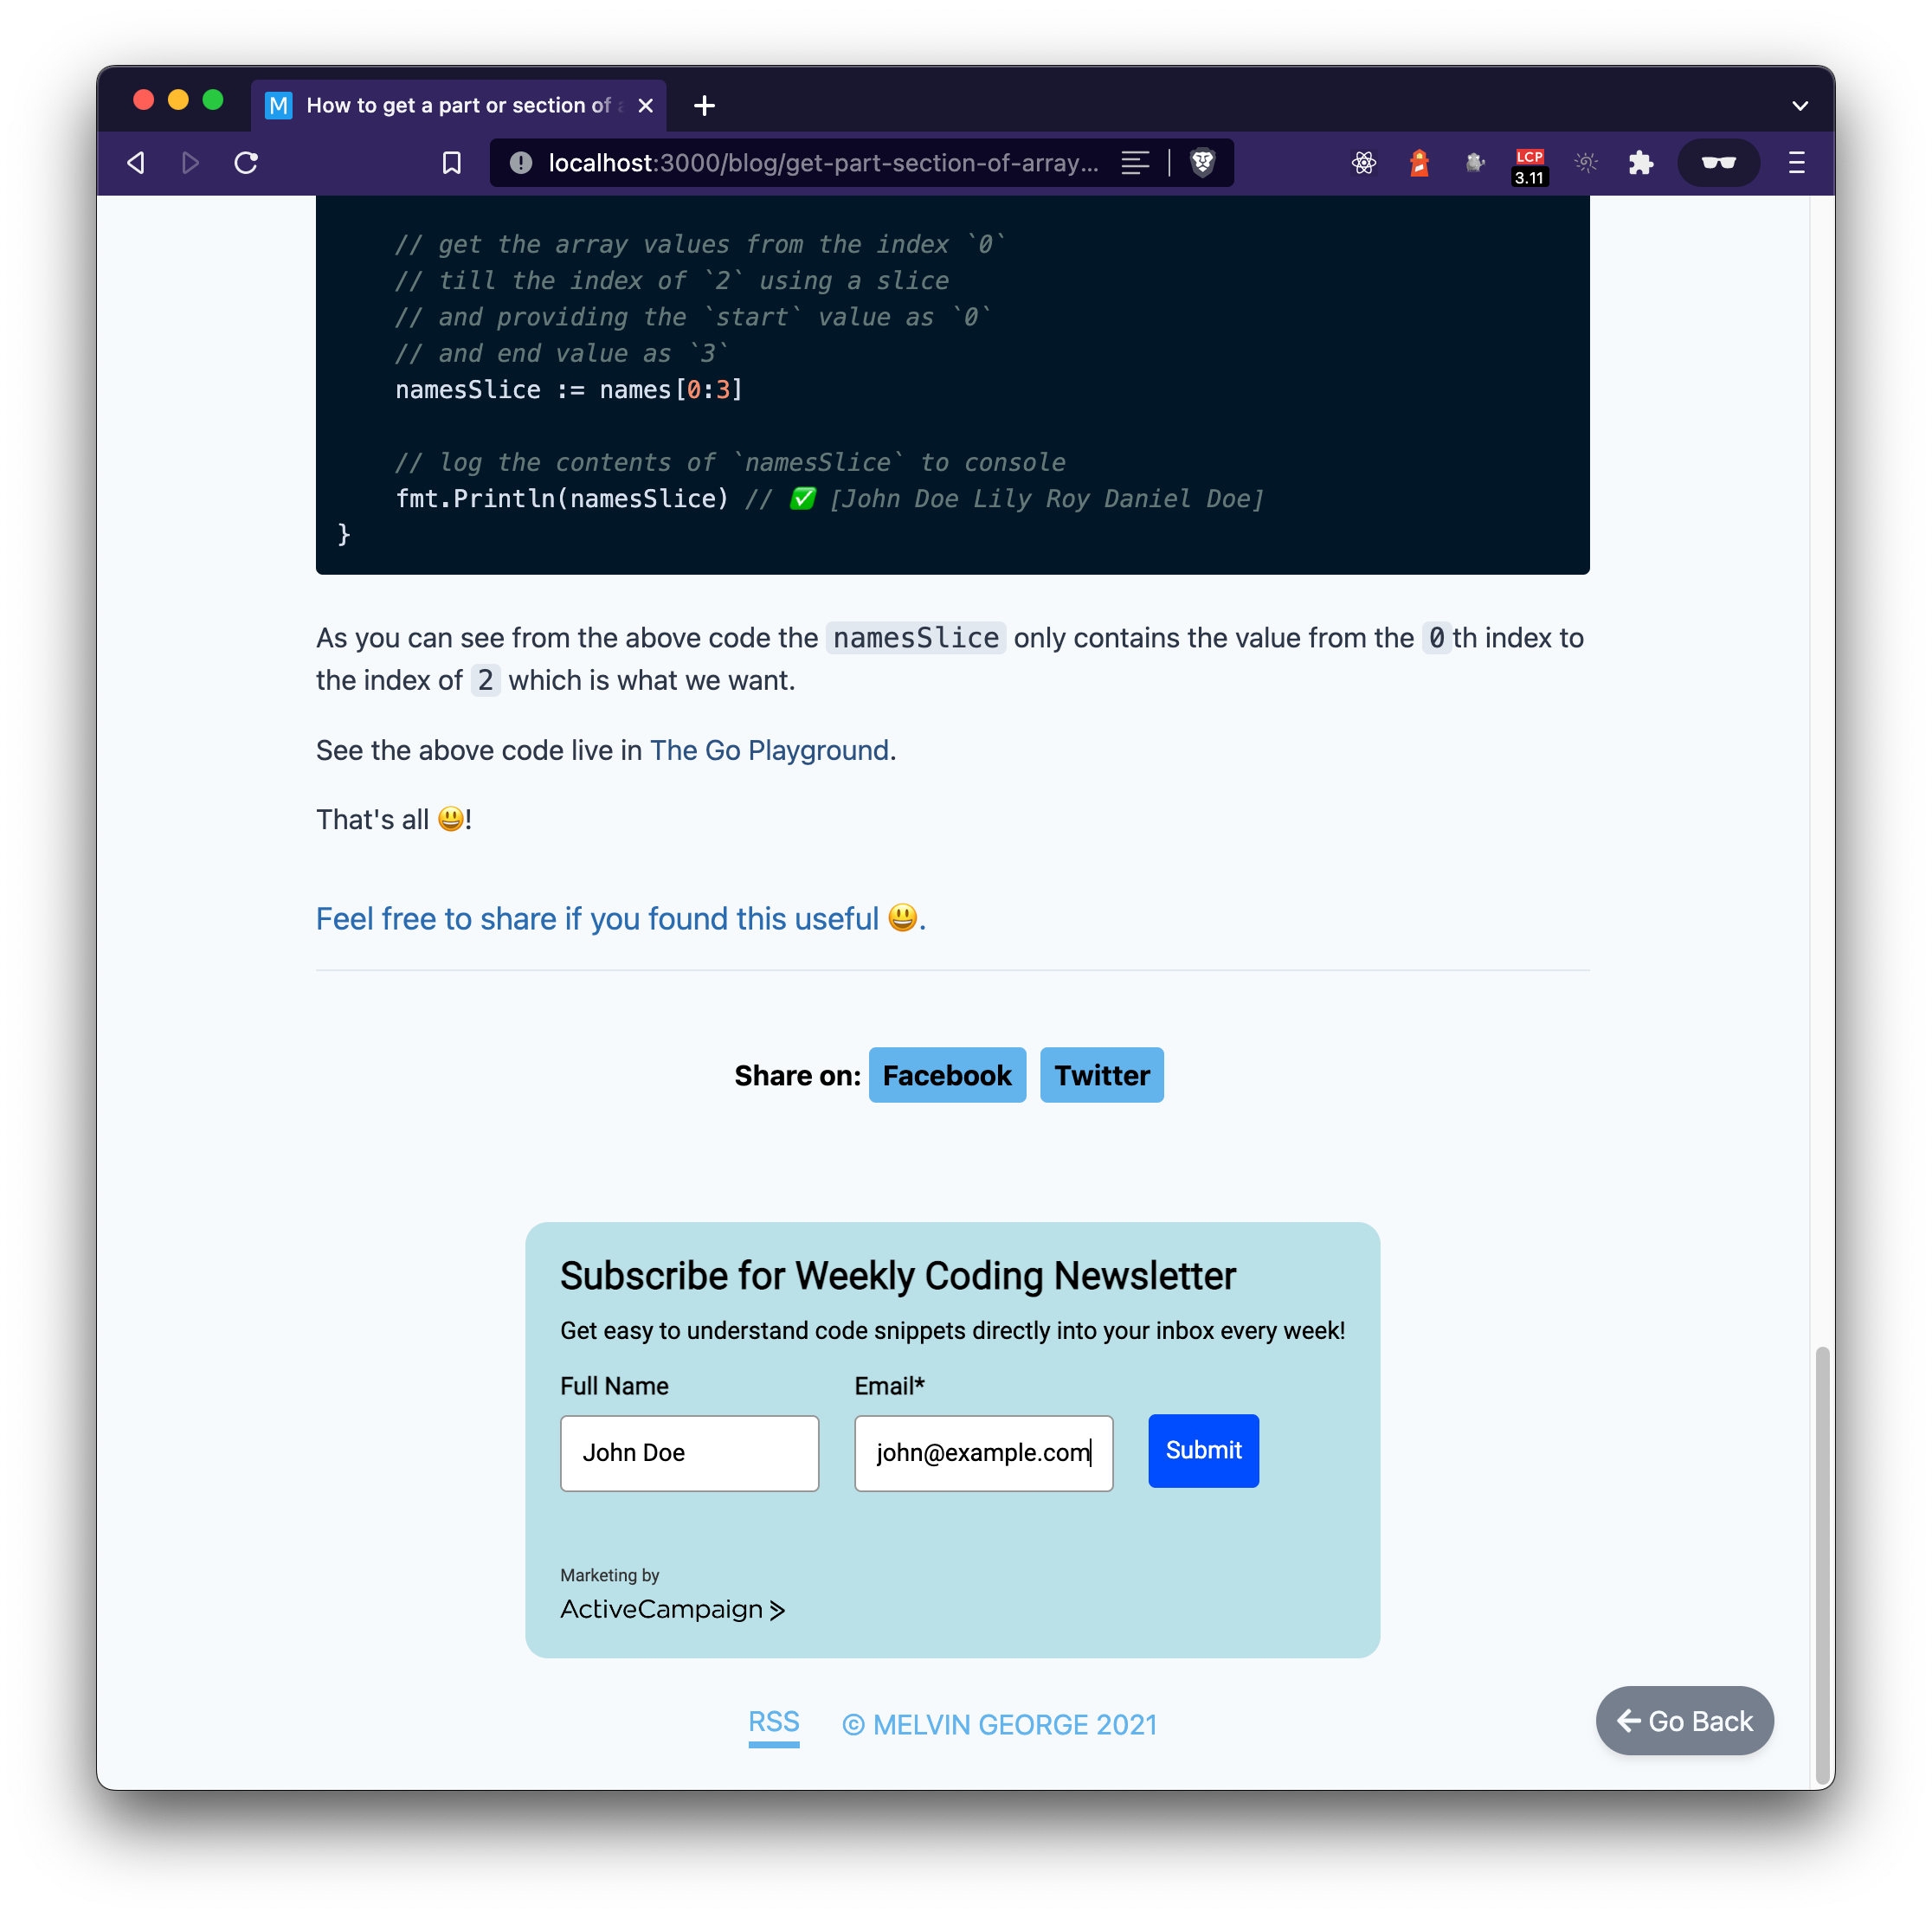
Now if you go to the page, you can see something similar in the below image,
We have created a newsletter subscription form and integrated it into our website using ActiveCampaign.
Step 5: Test the newsletter
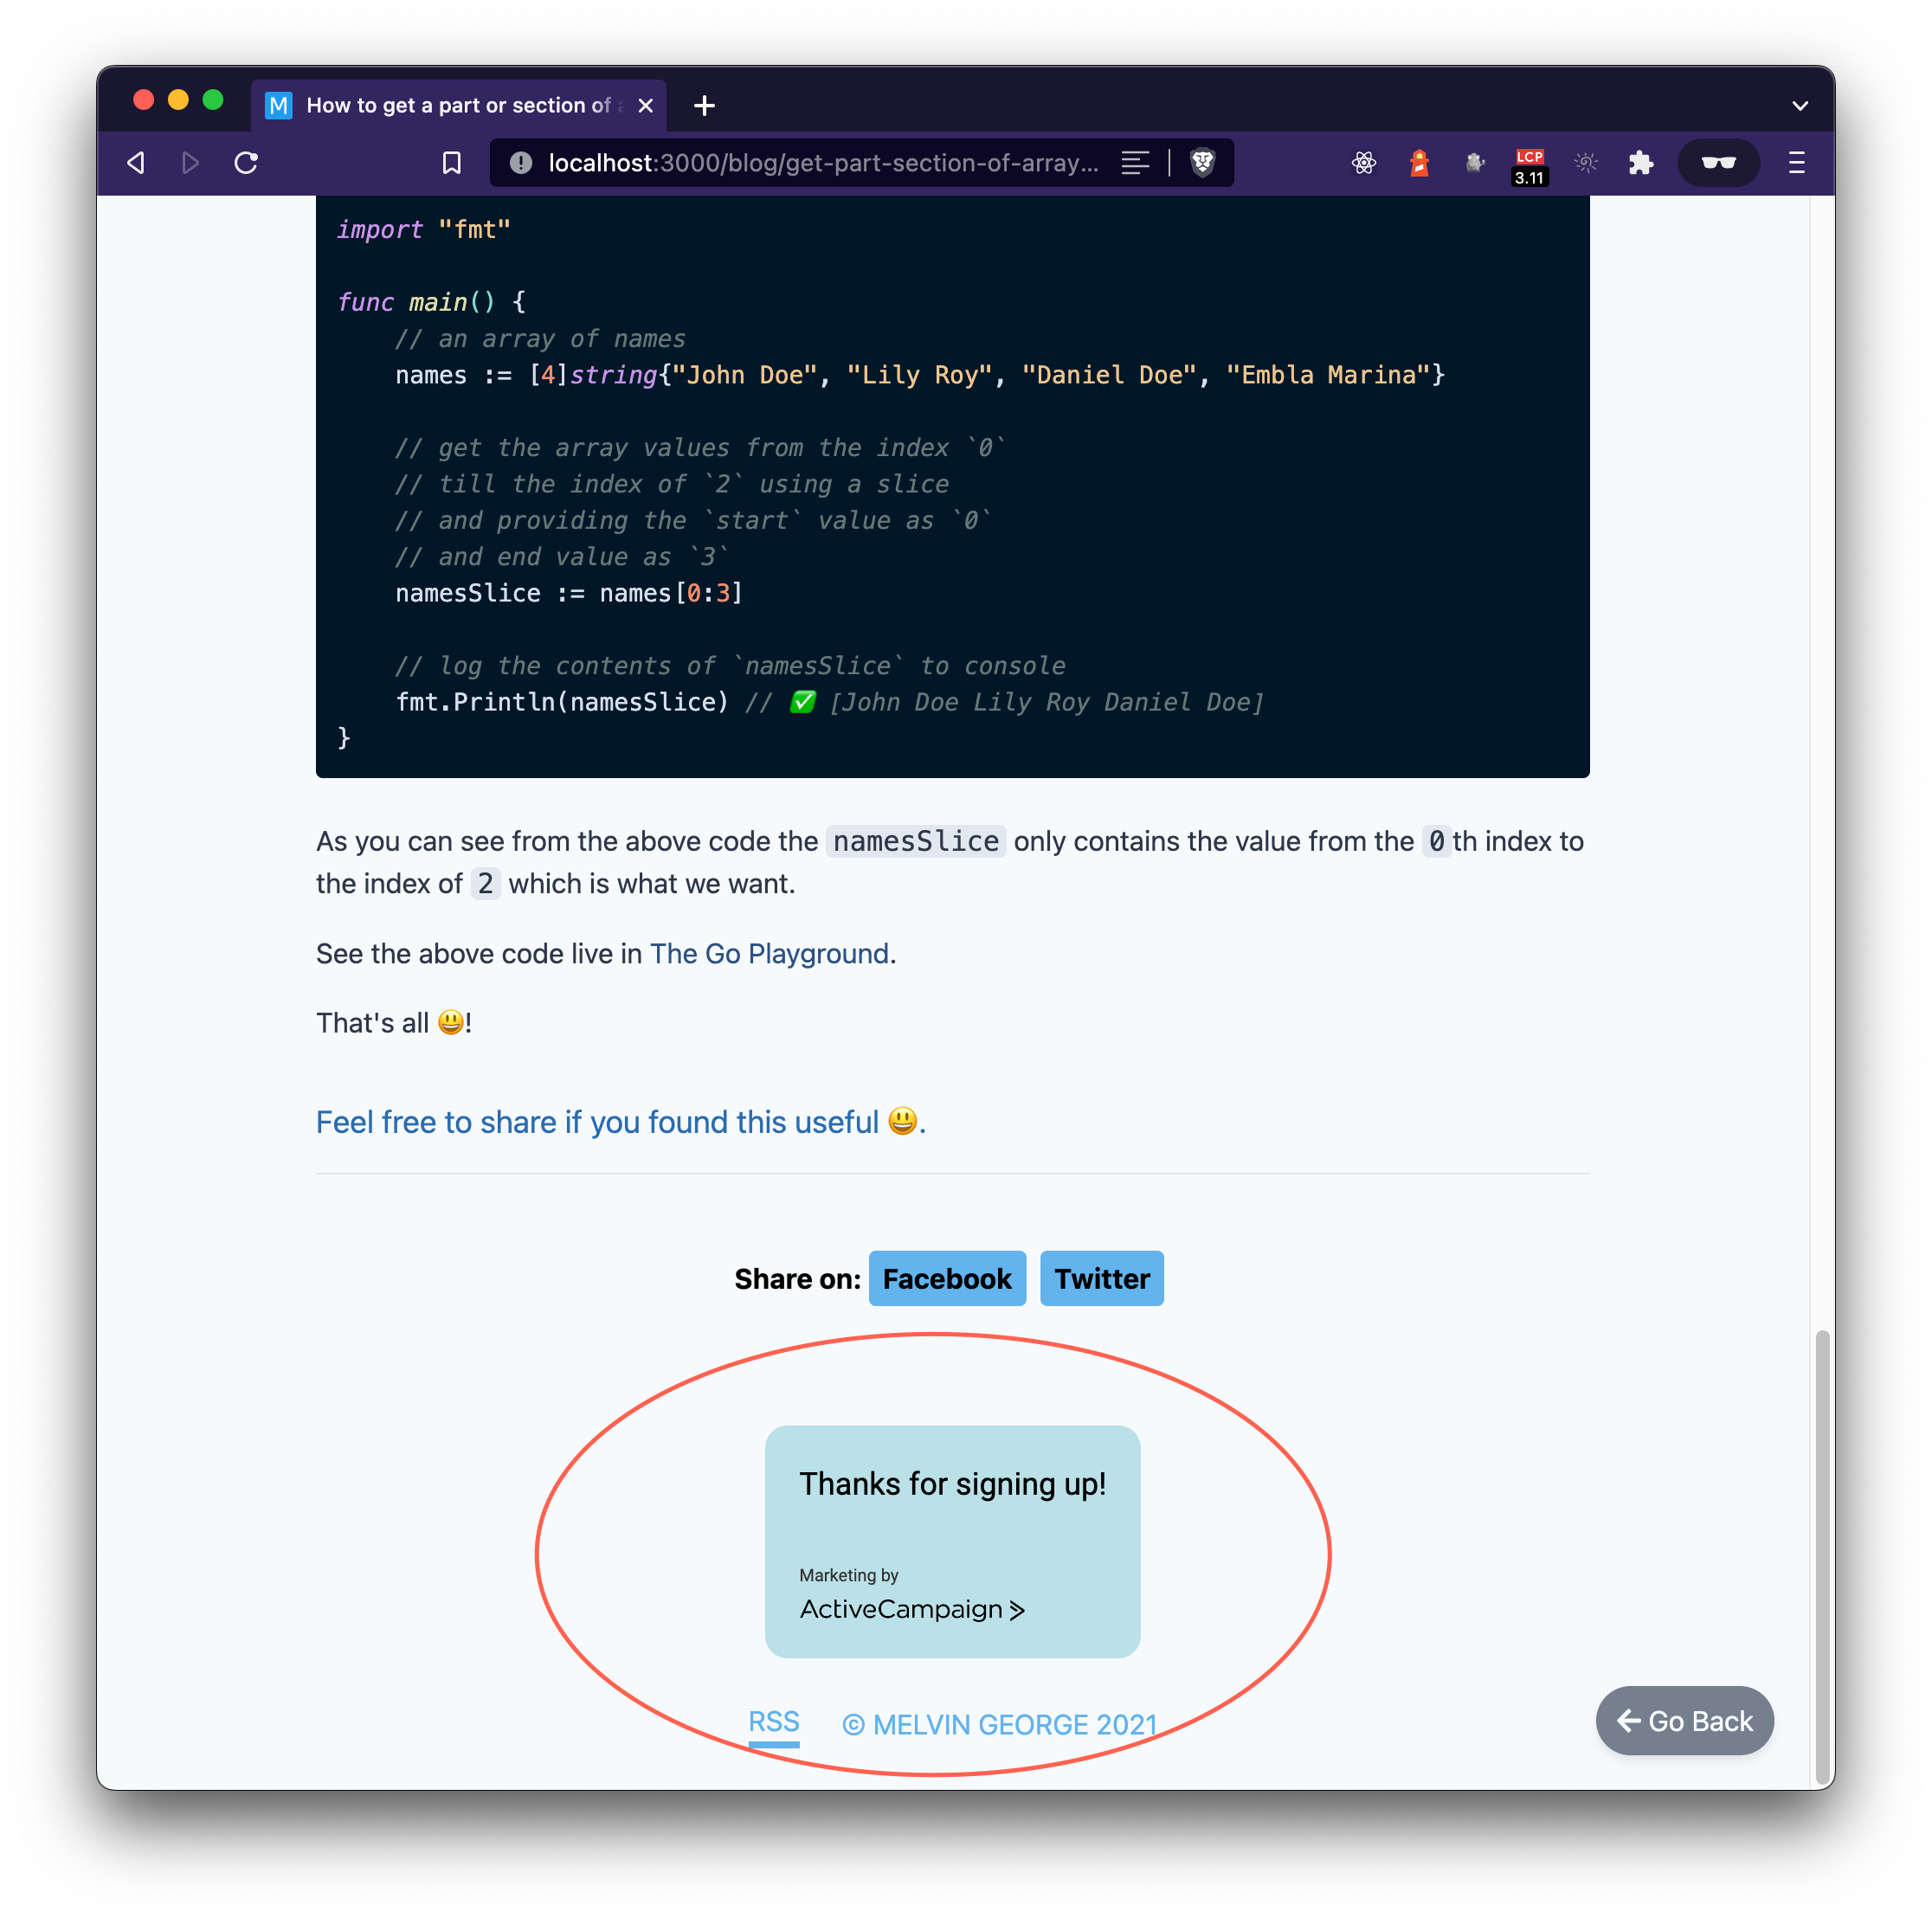
Now the only thing left to do is whether the integrated newsletter subscription form is working or not. To do that let's enter an email id and a name and then click on the Submit button like this,
After clicking on the Submit button, there will be a message shown to the user saying Thanks for signing up!. (This message can be customized from the form UI editor).
After the user has submitted the email id and the name, it won't be added to the Master Contact List yet. The user has to confirm the email id by opening the email account and manually confirming it.
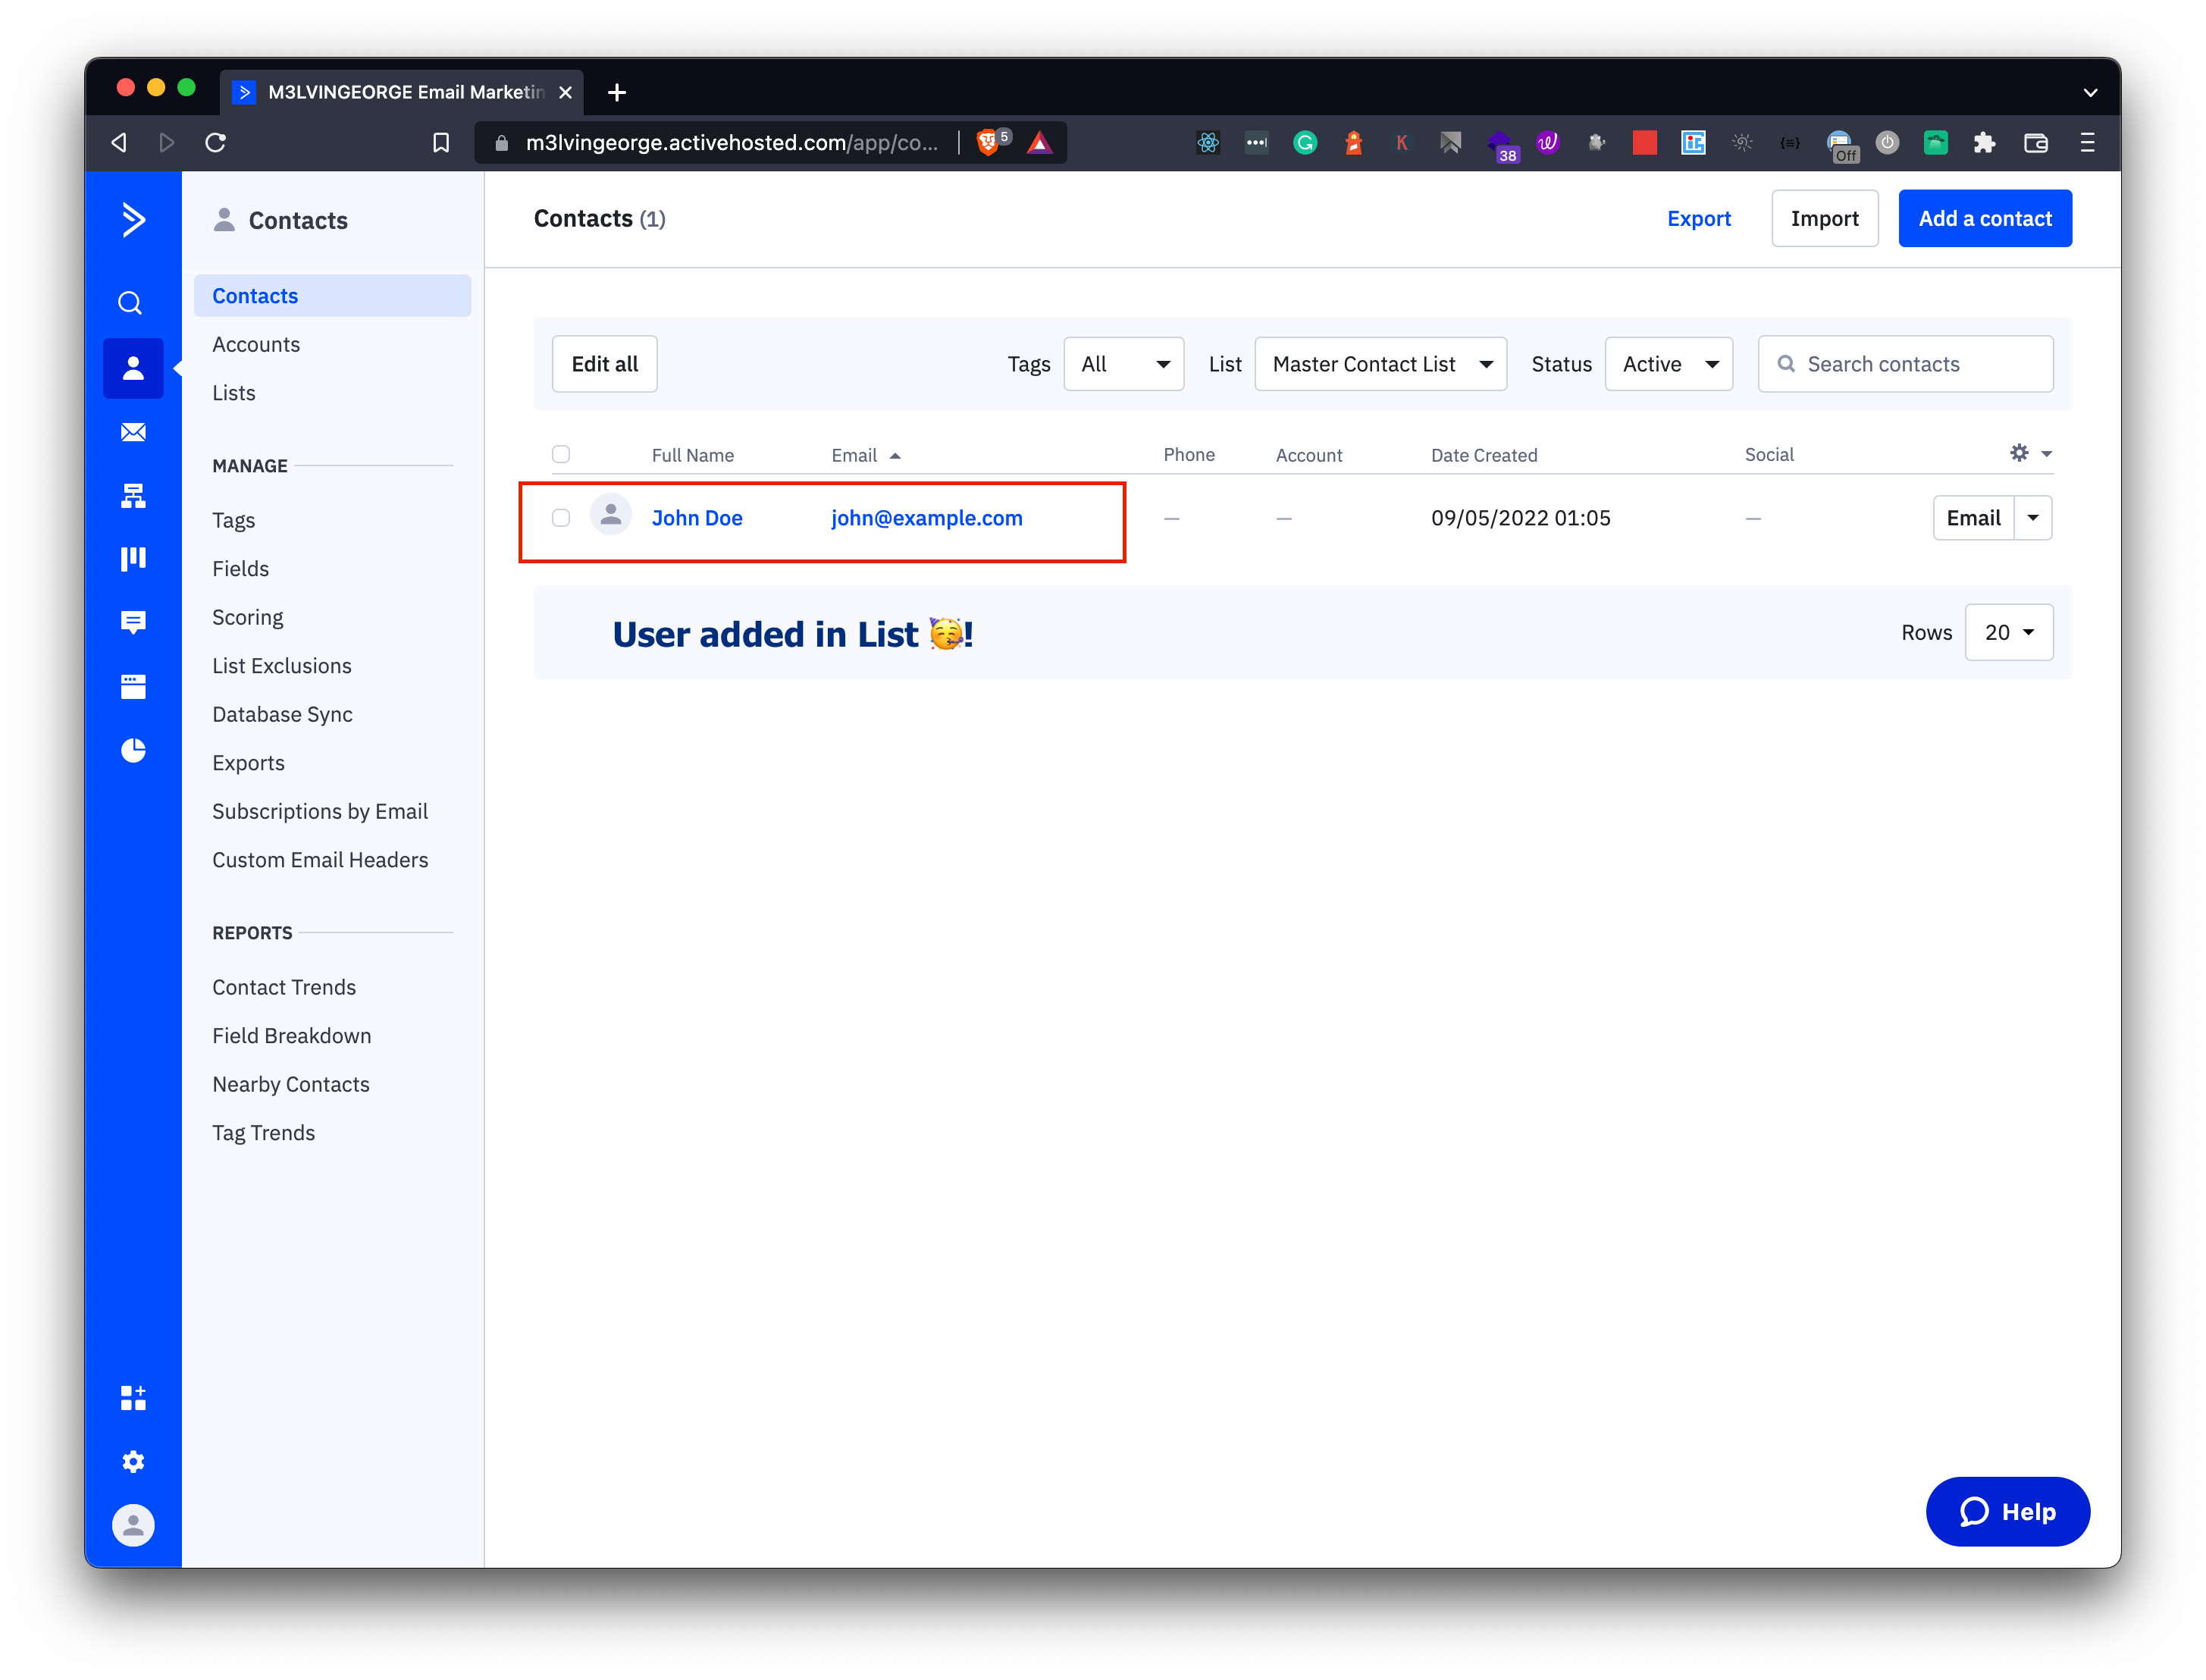
If the user has confirmed the subscription, then we can see the user in our Master Contact list.
To check you can go to the Contacts tab in the ActiveCampaign dashboard, then click on Lists, and then by clicking on the Master Contact List link.
It may look like this,

You can that the user is now added to the list like in the below image,
As you can see that with ActiveCampaign we were able to quickly add a newsletter subscription form to our website. Yay 🥳!
With ActiveCampaign, we can also do some cool things with the details of our subscribed users like automation, campaigns, one-on-one emails, creating landing pages, adding a messaging system to the website, and many more.
We will be discussing those in the upcoming blogs 😃.
That's all 😃.